Showing posts with label DIY Projects. Show all posts

Monday, March 3, 2014

Dining Room Remodel Project: Part 1

What is the room in your house that you are unhappy with?  It's been nearly two years since we've moved and there was one room in our house that I was itching to redo:  our dining room.  It sits right off of our entryway and is open to the house.  The paint color from the previous owners was faded and not very pleasant to the eye and I wanted it gone.  We spent a lot of time pondering what color to paint that room.  After several months of brainstorming we finally decided we wanted navy.  We brought home several of the paint sample cards from the store and ended up choosing a dark blue.  While probably not considered navy, it is by far the darkest, boldest paint choice we've made.  When I shared our choice with some of my family members and friends, I think they were a little taken aback.  The final result, however, was a hit (at least that's what they tell us!).

We chose the color Mesmerize by Behr.  It truly has been mesmerizing.  Oh, what a difference a paint color makes.  Our drab dining room became a room I was drawn to.  I still find myself looking in there thinking, "We nailed the color."  I love it!  Once the color was on the wall, we needed to pick some accent colors.  The winners were gray and lime green.  Once again, I am in love.  We don't have all our accessories yet, but what we do have has really popped in our new dining room.


Lime Green and Gray Accents
Lime Green Serving Tray on Hutch
One of our big projects was to make a wall hanging to replicate one I found on Pinterest.  I understand that not all things we find on Pinterest turn out well (have I mentioned how much I love the 'nailed it' clips on Facebook?), but this turned out better than I could have hoped.  My dear friend sent me a picture of a headboard she found at Goodwill for $8!  I gave her the okay and she kindly brought it home for us.  We were looking for something with a decorative accent and she found a treasure.  After sawing off the legs, we chose a light gray color and my husband got to work painting.  One day while looking around for accents at Hobby Lobby, I came across some lime green knobs that I thought would give a little flare to the piece.  It turned out great!  Eventually I would like to find a decal that says, "Give us this day, our daily bread" and split it between the two sides, but for now it's perfect.

What Once Was a Headboard, Is Now a Decorative Wall Hanging

We're still piecing together the patterns and textures that we're bringing into the room.  I'll share more on that once we finish the details!


Monday, July 16, 2012

Mama's getting organized!

I've slowly been working on getting everything organized in our house.  My first focus was on the kids' rooms and after a busy Saturday of decorating, I can happily say that I am about ready to close the door on that project.  Our house is starting to feel like a home and much more progress will be made in the next few weeks.  There is a motivational factor that I will share with you on another day!


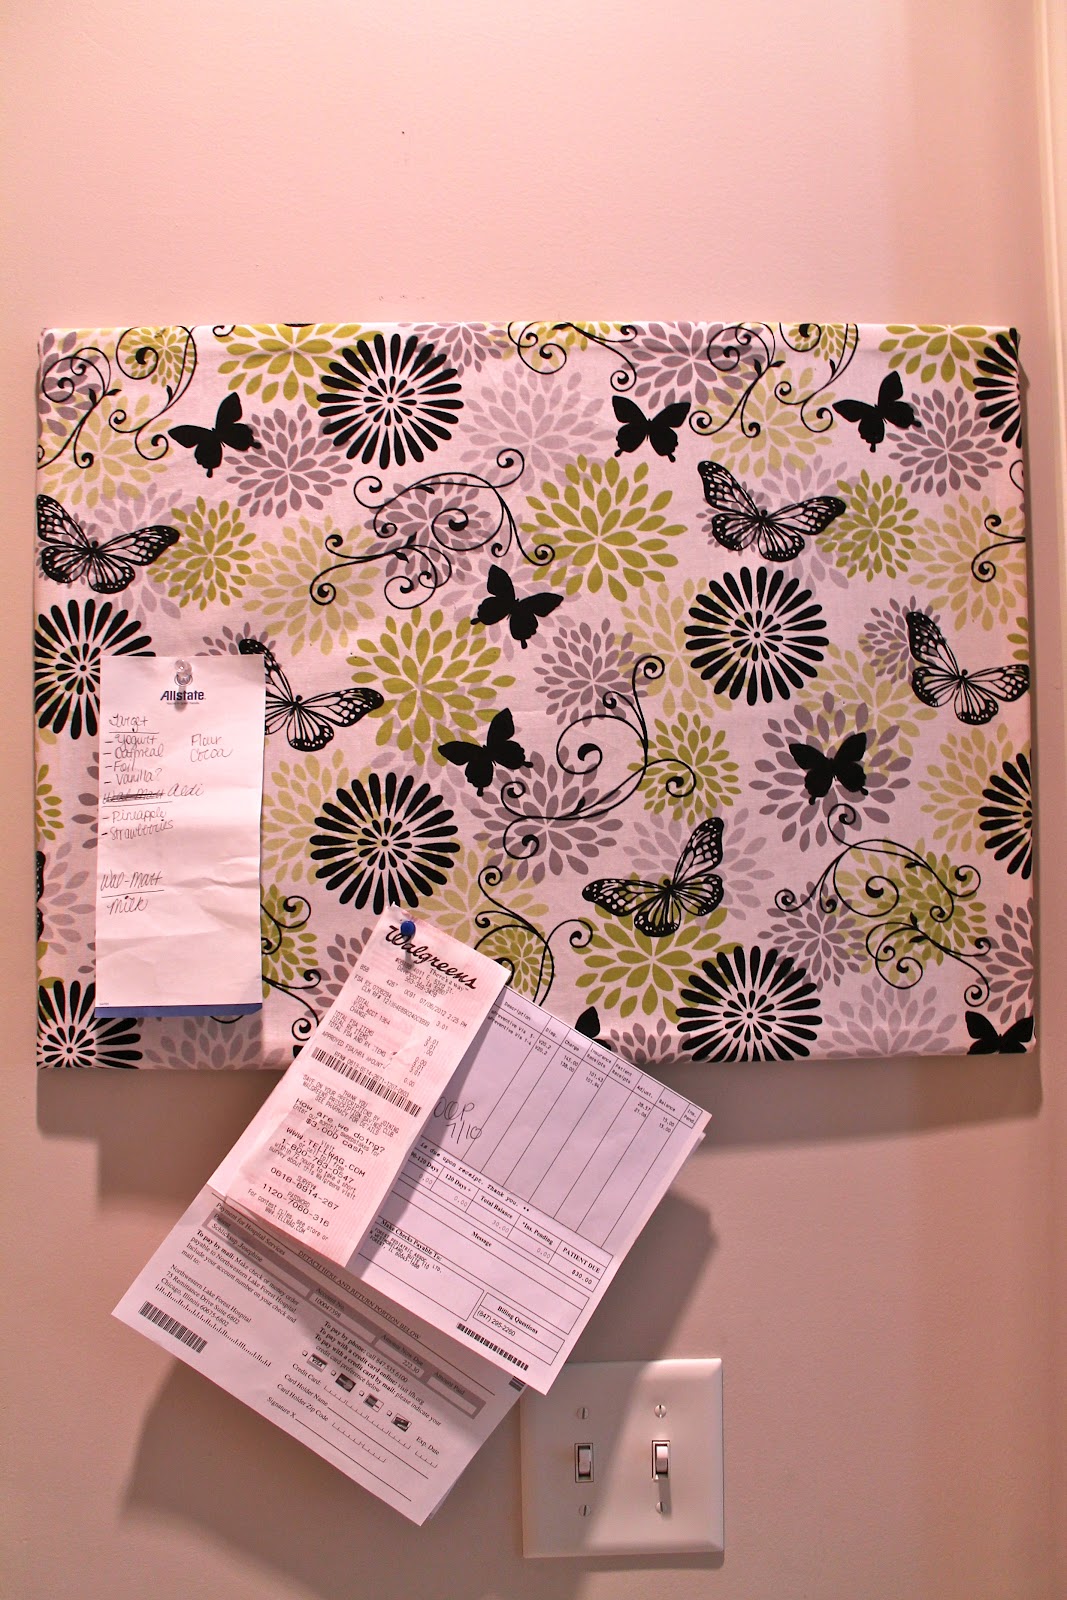
I am trying to get my "stuff" organized.  As you know, I like to make lists and I wanted a place to keep my tally of items we have run out of before I get around to making my grocery list.  I also usually have some pile of papers that I need to scan, mail, or file and I needed a place to put them until I can complete the job.  I decided to make my own covered cork board.  I'm really not that crafty, but I am pleased with the way it turned out.  I like the color scheme so much, I think I am going to use it in our half bathroom!


It was a very simple project.  I purchased a cork board at Hobby Lobby when they were 50% off.  I took it over to the fabric department, chose a pattern that I liked, and had the nice employee measure how much I needed.  It was a very low-maintenance project.  The only trouble I had was using the staple gun.  We only have a heavy-duty gun, but I used it anyway.  It was much more powerful than I needed, but it did the job.  The whole time I was working on my project, I felt like I was on an episode of the old TLC series Trading Spaces.  I always wanted to create my own decor!  Success story #1.  

The supplies all ready to go!
The finished project!


Monday, July 9, 2012

Mommy Bootcamp Update

We are almost two weeks into our Mommy Bootcamp and things have improved quite a bit in our home.  The kids have begun to listen better and love to fill up their sticker charts.  It has given them the motivation they needed to follow directions, though I admit that sometimes I am not the best at keeping up with it.  Last week was a bit crazy with the holidays and traveling, but we are starting a fresh week and I am back on my game rewarding them when they have listened.  Our kindness jar has been a positive addition as well, but it is taking a bit longer to fill up than I would have thought.  We get so close to it being full and then we have a few bad moments and it depletes.  I can't wait until it is full one day.  The kids are so excited for their "surprise."  I better make it a good one!


Getting out of our house was always one of the most chaotic and aggravating parts of our day, but we are starting to get it down!  Now that they have begun to follow directions better, I have set up an area by our back door that is also helping with this transition.  While I would have loved to put in built-in cubbies, this was not in the cards right now.  Instead, I purchased a storage bench at Target and each kiddo has been given a bin in their favorite color.  This is the place where we will keep the kids' shoes and winter accessories.  Since it is right by the door, it's the perfect drop spot.  There is also a cushioned bench and it is a great space for the kids to sit when they are ready to go.   Above the bench, we hung double hooks for their backpacks and coats and above that, a bulletin board.  Now that we will have two kids in school, there will be two sets of calendars and notes home.  This will be where I hang those items and any special artwork for the week.


Our Backdoor Storage

I have added a few things to my list of things to work on during Mommy Bootcamp.  The oldest child has begun to talk back and show his displeasure about participating in activities he does not want to do. While I do think it is okay for him to voice his opinion, he needs to learn to do it in a pleasant, respectful, acceptable way.  The middle child has become an absolute nightmare in the sleep department and we are trying to remedy the situation.  I am ready for her to be sleeping through the night again and I sure hope that it happens soon.  It is all trial and error, but I hope to be posting some positive improvements in these areas soon!


Thursday, June 28, 2012

Mommy Bootcamp Day #2: Responsibility (DIY Chore Chart)

Day 1 of Mommy Bootcamp was quite successful.  Both kids ended up with one time-out sticker left, so no one was grounded.  They have also been doing a great job with listening and happily running over to their charts to put up their latest sticker when they've earned it.  Even the little guy is understanding, so I am pleased with our progress from just one day.  More rewards have been given out today and our kindness jar is filling up, too!  Positive reinforcement really does go a long way!


Day 2 is upon us and we are learning a bit about responsibility today.  I finally completed their chore charts yesterday, so we are wasting no time in implementing those.  I was going for a very cutesy chore chart, but conceded to the fact that I couldn't find the materials that I needed without spending a fortune, so I made the next best thing:  an economical, simple chore chart.  


Supplies:  I nixed the spray paint and added a paint pen

Here's the run down of supplies:
-Cookie sheet (Dollar Tree), but check to see if it's magnetic first
-Wood Shoppe Wooden Nickel cutout circles (Hobby Lobby)
-Tree House Studio paint marker (Hobby Lobby)
-Craft Magnets (Hobby Lobby)
-Fine point Sharpies


All together I spent under $15 for the three charts with leftover materials to boot.  I plan to hang them using the 3M Command Strip picture hangers.


Each child has an age-appropriate chart.  Some of their chores are part of their daily routine, but the visual cues will hopefully decrease the number of times I have to repeat myself to get these daily tasks done.  The oldest has five chores:  make bed, get dressed, brush teeth, clear dishes from table (which I move over before each meal), and clean up toys.  The middle has four chores:  make bed, get dressed, brush teeth, and clean up toys.  The youngest has three:  get dressed, brush teeth, clean up toys.


Once they completed their chore, they happily ran over to their charts and moved their circle to the done side.  We will continue to add to these as more tasks become age-appropriate, but I am happy with what we have now.  It gives everyone a sense of responsibility and they feel a sense of accomplishment.


The simple chore chart

Friday, June 22, 2012

The Happiness Project

As I had previously mentioned, I struggled for a long time to have an identity other than "Mom."  For some reason, once our oldest son was born, I just let go of most everything I enjoyed doing and let my child-rearing take center stage.  In hindsight I realize this was a big mistake, but at the time it seemed like the right thing to do.  He was our first child and I wanted to do everything right.  I read the parenting books and magazines religiously and closely followed my birth board on Baby Center.  It just seemed natural that my life was consumed by this beautiful little boy we had brought into this world until my eyes opened one day and I realized that I had lost myself.  My husband would often ask me, "What do you like to do?"  I really had no answer other than being a mom.  

One hobby that I enjoyed before baby was reading.  I loved to pick up a good mystery or romance and read it front to back in a few days.  I decided that I would like to pick that back up again.  Over the course of the past four years I have read many books, though my tastes have evolved.  Don't get me wrong, I still love "mindless reading" as I call it, but I have also dabbled in the non-fiction world as well.  I usually choose some inspirational or thought-provoking book and try to apply it to my life. Now the majority of the books I check out from our local library are from this genre.

Earlier this year I read a book called The Happiness Project by Gretchen Rubin.  I enjoyed it and it made me think about my own happiness.  Wait, you might think, your own happiness?  Up until that point it was something that I never really gave much thought to.  I was always going out of my way to make others happy, especially my kids, but I didn't really do much for myself.  This book opened my eyes a bit and I began my own version of a "happiness project."  It was not a very in-depth project.  I bought a journal with three sections and created areas I'd like to work on:  health, personal, and financial.  Each month I would create three goals in each of those areas and track my progress weekly.  I would challenge myself to go out of my comfort zone a bit, but I found that once I completed my goals I was indeed happier.

This went well for a few months and then the big move came into the picture.  I had to put my project on hold, as I was too busy looking for a new home and packing up our belongings.  Now that we are beginning to settle in, I resumed my project in the beginning of June.  I am finding that it is helpful to set those personal goals and it still brings great joy when I accomplish what I set out to do.  While it is still a work in progress, I am making an effort to bring some balance back into my life and this seemed like a great way to focus and track my progress.  

I would encourage you all to set some goals each month and work to meet them.  My goals are all over the place from trying a new exercise class to using reusable bags instead of the plastic bags at the store.  They are by no means crazy, but they are little things that make a difference to me.  The beauty of this project is that each person's is unique.  It makes you think about the little things and what you could change to bring more happiness into your life.  You know how the saying goes, "Happy Wife, Happy Life."  Go ahead, give it a shot!  


It's the little things in life


Tuesday, June 19, 2012

A Little Kindness Goes a Long Way

Being a parent is by far the most important job in the world.  If I were to write a job description for being a parent, it would go something like this:  "Responsible for feeding, clothing, teaching, shaping, providing, loving, and caring for an individual day in and day out for the next 18 years and beyond."  That, of course, is just the tip of the iceberg.  Being a parent is tough.  Each day brings new challenges, surprises, and joy.  It is a constant learning process with ups and downs.  Some days you feel successful and others you feel like you have done nothing right.  The fact of the matter is this:  at the end of the day there is still someone who thinks you are the most fantastic person in the world....your child!


As a parent, you are your child's first teacher.  It is our job to mold these impressionable little beings into good people.  There are times when it is easy to forget that someone is watching your every move (or so it seems) until you hear or see something you wish you hadn't.  Come on, you know you've all been there!  I do my best to correct the problem and move on.  After all, no one is perfect!


Kindness is a virtue that we feel strongly about.  We encourage our children to be kind and respectful to others.  This behavior starts at home.  As in all families, our kids fight.  They are close in age, so their interests overlap and this can cause some problems in our home.  It is my goal to teach my kids to resolve their problems in a calm and kind way instead of screaming at and hitting each other.  Now that summer is here and all three kids are home every day,  I knew we needed to make something to create some incentive to think about our actions and words.


It is a well-known fact that kids respond better to rewards than punishment.  Our kids are familiar with both, but I am trying to come up with more positive ways to shape their behavior versus just using time-out and/or grounding.  In order to cut down on the fighting, I decided to reward kind behavior.  Yes, this takes more effort on our part to pay attention and remember to reward them, but in the long run I think we'll all be better for it!


Today we implemented the "kindness jar."  I needed to use something that wasn't breakable, so we upcycled an empty parmesan cheese container to make our jar.  I broke out the old glue gun and glued some foam bugs on the container to dress it up a bit.  I also bought colored poms to fill it with.  The concept is simple:  if you are kind to someone in the house, you may put one pom in the jar.  If you are unkind, you have to take two poms out.  Once it is full, the whole family will receive something special.  Easy enough, right?


Since our kids are still pretty young, we had to have a discussion about what types of behaviors will be rewarded with a pom for the jar and what will get them taken away.  I added one more rule:  don't ask to receive a pom for something that you did.  I'd like this to be a genuine act of kindness and not an intentional act to receive a reward.  The kids think it's a great idea and I am hoping we have positive results!


Our Kindness Jar


Monday, June 18, 2012

Let's Get Organized!

After the big move, I lost a lot of motivation to actually work on the house.  We unpacked our necessities and took a few weeks off to recover from the whirlwind of packing, cleaning, and unpacking.  Over the weekend my desire to start turning our new house into our home began to stir.  I had pinned some organization ideas to Pinterest and finally to the time to really look at them today to see how I could adapt them to fit my needs.


My two biggest tasks are a control center and chore charts.  Many of you may be asking, "What is a control center?"  Let me share.  I plan to create a space that holds the following:  dry erase board for appointments, games, activities, etc., a menu board, and the chore charts.  I am not the craftiest person in the world, but I think I can make all of these items myself.  I just need to get my supplies so that I can get to work!  My goal is to be sharing the finished product with you by the end of June.


I am looking to bring some order to a home that is a little chaotic by nature.  Having young children lends itself to this, but I really like everything to have a place.  Now that we have much more space than we used to, I desperately need more storage and organization items to create order.  As a former teacher, the wheels have been turning in my head since we bought this place.  How can I create designated spaces for the kids' areas of play?  Even better, how can I teach them to put their treasures back where they found them?


I think I will revert back to the days in the classroom and create "centers" so to speak.  This is a project that I also look forward to completing, as I feel like everyone benefits when a space is well-defined.  There are two areas that I really want to make fun and functional:  dramatic play and arts and crafts.  I look forward to some more DIY projects for these areas as well.  Time to get pinning!