Showing posts with label Cookie recipes. Show all posts

Friday, December 20, 2013

Cookies for Santa

There is simply not enough time in the day for me to accomplish even half of what I'd like to do! Unfortunately, my blog (which I really enjoy doing) has taken a back seat the past few months to the other demands in my life.  I wanted to quickly share with you this fun cut-out cookie project that you could do with your children this weekend.  They make great "cookies for Santa!"
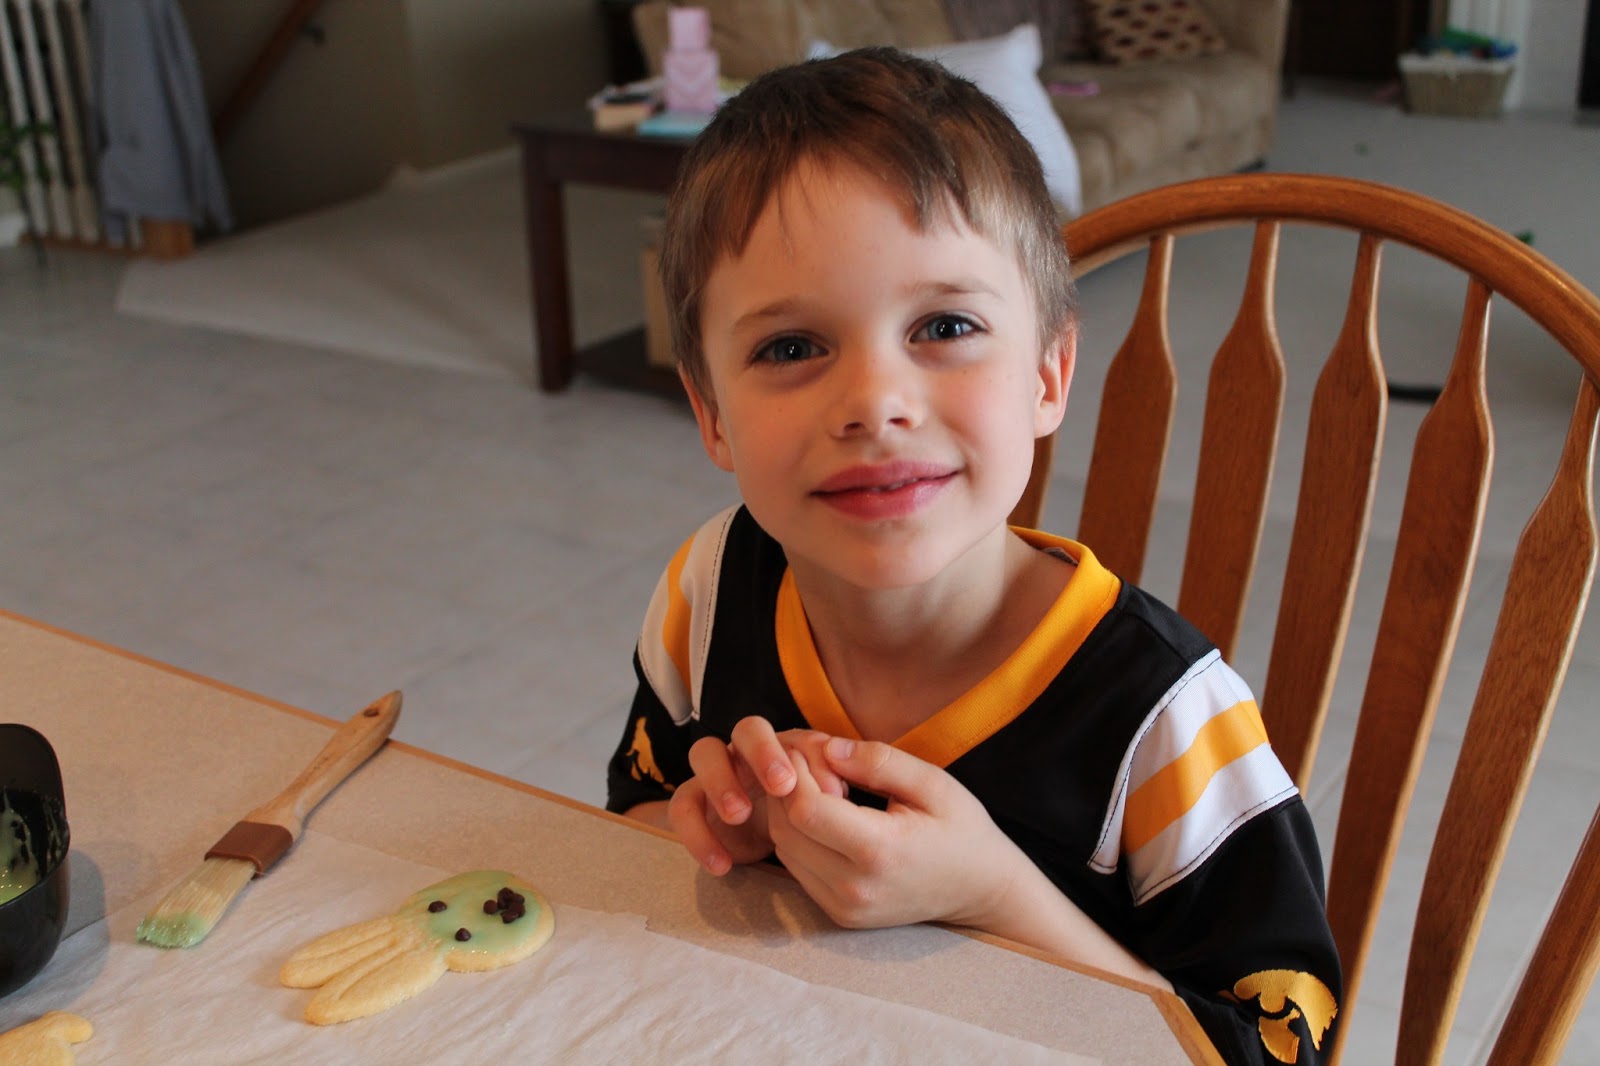
I have found a yummy cookie dough recipe that I have been using for the past few years.  Initially I started using it when I made cookies on a stick, but it works well to roll it out thinner for regular cut-outs as well.  Mix up the dough and let it chill for awhile.  Once it's firm, grab some cookie cutters and get to work!  Once they are cooled, give your kids some paint brushes (wide is best) and let them paint their cookies with some icing.  I'll include both recipes!  

Our kiddos love this project.  They love to select what cookie cutter to use and decorating their cookies especially for Santa!  Once they're dry, I throw them in the freezer and we pull them out on Christmas Eve so they're nice and fresh for Santa!  Enjoy!

Sugar Cookies
Adapted from Sweet Sista'

3 c. all-purpose flour
1 t. baking powder
1 c. unsalted butter, softened
1 c. sugar
1 large egg
1/2 t. salt
1 tsp. vanilla

Sift together flour and baking powder.  In a large bowl, beat the butter and sugar until light and fluffy.  Stir in the egg, salt, and vanilla.  Slowly add the flour mixture (1 c. at a time) and stir until incorporated.  Form the dough into a disc and refrigerate for one hour.  Preheat oven to 375 degrees.  Cut the cookies into shapes and place on parchment paper lined cookie sheet.  Bake 8-10 minutes or until the edges begin to turn golden brown.  Remove from oven and allow to cool.  Place on a cookie rack to fully cool.  

Icing

1 c. powdered sugar
2 t. milk
2 t. light corn syrup
1/4 t. vanilla

Warm milk.  Stir in powdered sugar and stir until smooth.  Mix in corn syrup and vanilla and mix until smooth and glossy.  If it's too thick, add more corn syrup.  Divide into bowls and add coloring.  Paint on with paintbrushes.


Painting away! 

Wednesday, October 9, 2013

Too Much Stuff (and a Stuffed Cookie Recipe!)

For quite some time now I have found myself looking around our house thinking, "We have way too much stuff!"  Clothes, toys, movies, magazines...stuff!  Perhaps it is due to my lack of proper organization, but I feel like there are always piles of stuff everywhere!  I know that we are a society that believes that we never have enough, but really, my house has more than enough and then some.  

What am I to do about this problem?  Well, I'm going to devote the next month (or maybe two!) to going through our stuff room by room.  Once I've cleared out the unnecessary stuff, I will sort it into donation, sell, or trash piles and then figure out the best way to organize that room.  I have been on the hunt for some good treasures online that I can turn into nice looking storage for very little cost.  My first score was a $10 bookshelf with some character and nice rectangular shelves for baskets.  We plan to refinish or paint it and hopefully it will be useful by the end of the month!

As I progress with this project, I hope to show my before and after pictures.  Currently I am focusing on clothes.  Mostly it is the children's clothing store we have housed downstairs, but our closet is getting a good cleaning out as well!  Do you have too much stuff, too?!  Join in the fun and share your progress!

In the spirit of "stuff," I thought I'd share this awesome cookie recipe with you:  S'Mores Stuffed Chocolate Chip Cookies  Healthy?  Not one little bit.  Delicious (yes) and they're monstrous, so be prepared to share!

S'Mores Stuffed Chocolate Chip Cookies
From Picky Palate

2 sticks butter, softened
1 c. sugar
3/4 c. brown sugar
2 eggs
1 T. vanilla
3 1/2 c. flour
1 t. kosher salt (don't cheat, buy this!)
1 t. baking soda
2 c. semi-sweet chocolate chips
24 graham cracker squares
12 large marshmallows (cut in half lengthwise, use a wet scissors to help with stickiness)
3 Hershey bars, broken into rows of 3 bars

Using a mixer, beat the butter and sugars until light and fluffy.  Add eggs and vanilla and continue to beat until well combined.  Place flour, salt, and baking soda into a bowl and mix until blended.  Slowly add wet ingredients along with the chocolate chips.  (Use your muscles as this dough is stiff!).

Layer graham cracker with a marshmallow and chocolate row.  Top with other graham cracker.  Top s'more with a large scoop of cookie dough.  Place in hands and put another scoop of dough on the bottom then front and back sides as needed.  Form dough around the s'more.  It's messy, but you can do it!  Place 4 large cookies onto a cookie sheet lined with parchment paper and bake at 350 for 15-17 minutes or until edges are golden and centers are cooked through.  Repeat until done.  Let cool for 10 minutes before transferring to cooling rack.  YUMMMMM!!!!

Makes 12 large cookies.

*You can also make these into bars!  Line square pan with parchment paper.  Layer the bottom of the with cookie dough.  Build s'mores on top and cover with the rest of the dough.  Bake at 350 for 30-35 minutes or until dough no longer looks raw.  Best served warm!

Just bake 4 at a time.  6 was too many!

Delicious!


Wednesday, September 11, 2013

Life Lessons

Today we delivered our treats to our local fire station and a fire department in the "big city."  Our local fire department is volunteer, so we had to find one where firefighters were present!  The kids did a wonderful job thanking these heroes and they even got something special in return:  sitting in the police car and fire trucks!  They asked plenty or questions and the men graciously answered.  On the way home, they said that they had fun and they really enjoyed doing it.  I'm so glad my husband suggested we do this.

Fire Station Visit

Police Station Visit

If you saw yesterday's post, we made some sugar cookies and rolled them in red sugar.  We tried a new recipe and they were delicious (but definitely not high on the health meter!).

Sugar Cookies
Source:  Taste of Home

1/2 c. butter, softened
1/2 c. shortening
1 cup sugar
1 egg
1 teaspoon vanilla
2 1/4 c. flour
1/2 t. baking soda
1/2 t. baking powder
extra sugar

In a large bowl, cream together butter, shortening, and sugar until light and fluffy.  Add egg and vanilla; mix well.  Combine flour, baking soda, and baking powder; gradually add to creamed mixture.  Shape into 1 inch balls.  Roll in sugar.  Place on parchment paper lined cookie sheet and flatten with a glass or fork.  Bake at 350 degrees for 10-12 minutes or until set.  Place on wire racks to cool completely.  

Tuesday, July 30, 2013

Honey Cookies

Life is so busy these days!  Not "I've over-scheduled my family busy," just "I have a lot of kids and a house to take care of busy."  Throw in my adventure with a friend in creating a community charity project, fitting in exercise, and dabbling in a new adventure (to be disclosed at a later date!) and that equals up to not enough hours in a day.  Considering the days begin at 5:30 and don't end until 10:00, that's saying something!

I've continued with the Couch to 5K program and have to finish up week 6 this evening or tomorrow morning.  It's gone pretty well and I hope my body continues to hold up for the Color Me Rad race at the end of  August.  Once school resumes and the baby is a bit older, I think I'll be ready to hit the gym again and start working on strength training and other cardio activities, too.  While the baby weight is slowly coming off, I still have a long way to go!  (The recipe at the bottom of this post won't help, either!).  

We've tried to stay busy over the past few weeks.  The kids have begun to fight more since they've been together every day for weeks, but summer vacation is drawing to a close.  While that makes me a little sad, and admittedly our summer was not as fun and pleasant as I had hoped, I am looking forward to some structure again.  I am not, however, looking forward to rushing around in the morning and getting everyone out the door or the grouchiness that comes out once school is over.  It will definitely be an adjustment period for us all again!

On this rainy day, I decided to pull out one of my favorite cookie recipes from long ago:  Honey Bee Cookies.  We purchased some local honey from the fI don't make them often, but when I do, they're gone quickly!  Enjoy!

Honey Bee Cookies
from Alpha Bakery Children's Cookbook

1/2 c. margarine or butter, softened
1/2 cup packed brown sugar
1/2 cup honey
1 egg
1 1/2 cups flour
1/2 t. baking soda
1/2 t. salt
1/2 t. ground cinnamon

Beat butter, brown sugar, honey, and egg in a medium bowl on medium speed, scraping bowl constantly until smooth.  Stir in remaining ingredients.  (The dough will not be thick like regular cookie dough).  Drop the dough by teaspoonfuls onto cookie sheet (I put parchment paper on mine).  Bake at 375 degrees until set and light brown around edges (surfaces of cookies will appear shiny), 7 to 9 minutes.  Let stand 3 to 5 minutes before removing from cookie sheet. 

Dough is sticky, but not very stiff

The finished product!


Tuesday, March 26, 2013

Easter Fun!

Okay, I have a confession...I've been really bad about doing craft and fun projects with the kids lately.  It seems like I've had so many things to do to prepare for Baby #4 that I've slacked off and just let the kiddos play most days.  I figured it was time to do something fun with them to celebrate Easter, so today we did a few crafts and over the weekend my mom was kind enough to make some cookie dough for the kiddos to cut out some cookies to decorate.  Mom-guilt washed away!

Today we made stained glass Easter eggs to put in our front door windows and a bunny ear headband.  Not too many supplies needed:  contact paper, construction paper, tissue paper, card stock, and a stapler.  For the eggs, I cut out the shape of an egg from construction paper and stuck it on the contact paper.  We already had some tissue paper cut up, so they stuck it on.  You can also have your kids rip it.  To make the bunny ear headbands, I used pink card stock and large white construction paper to make the headband.  My daughter is almost four, so she cut out her ears (and did pretty well!).  For the little guy, I did it all.  Once we were finished, they practiced their hopping and finding some eggs.  


Little Easter Bunnies


Stained glass Easter Eggs

If you're looking for some other activities, one of my favorites is to make glossy Easter eggs.  Cut out an egg on some card stock or poster board.  Add some corn syrup to regular washable paint and it will dry very shiny.  It's so pretty and on my list of things to do later this week.  You can also take some plastic eggs, separate them, and let the kids paint with eggs by stamping.  I also plan on making a bunny puppet with a brown lunch sack.

The kids had a great time yesterday finding eggs that I had hidden around the house.  We like to practice!  After awhile, I had the kids hide them for each other.  Oh the giggles!  You can turn this into a math game by giving them a specific number of eggs to find.  You can also take a Sharpie and put dots on one half of the egg and a corresponding number on the other (use different colors, it is more challenging) and have the kids match them up.

As I mentioned earlier, we made cut-out cookies and decorated them with frosting over the weekend.  The kids got to paint the frosting on and had a blast.  I'll include the recipe that I use to paint the cookies.

Cookie Glaze Frosting

1 cup powdered sugar
2 t. milk
2 t. light corn syrup
1/4 teaspoon vanilla
Food coloring of decorating gel

In a small bowl, stir together the powdered sugar and milk until smooth.  Beat in corn syrup and vanilla until icing is smooth and glossy.  If icing is too thick, add more corn syrup (this is always the case for me.  You could add a bit more milk and then corn syrup until it is thin enough to spread).  Separate into bowls and add coloring gel or dye.  Paint them with a brush.


Cutting them out


Painting away!


A finished product!


Sunday, February 24, 2013

Getting Some Work Done...Only to be Interrupted by a Cookie Craving!

Yesterday I spent the day prepping for baby #4 (finally!) and was pleased to cross some things off of my list.  We took a trip to Home Depot in the morning to pick out a paint color for the nursery and I hope that it will be painted by next weekend.  Since we do a gender-neutral nursery, we were thinking about yellow or green (our nursery in our old house was bright green), but after some discussion, we decided to go with gray.  It may seem like a strange color choice for a nursery, but we checked out some photos on Pinterest and loved that we can use purple and pink for a girl or blue and green for a boy.  

While we still have some work to do, the basics are taken care of.  I ordered diapers online last night from Diapers.com and Target, as well as some other necessities on my list.  Big sigh of relief here!  As the day went on, though, I started to have a little craving for some homemade cookies.  I searched the pantry, only to find that we had no chocolate chips, so I opted to try to find a new cookie to make with oatmeal.  After a quick internet search, I found a recipe that looked good, and whipped up a batch.  They were delicious!  Soft and chewy and a little snickerdoodle-like.  Here's the recipe!

Soft and Chewy Oatmeal Cookies (found on Allrecipes.com)

1 cup unsalted butter, softened
1 cup white sugar
1 cup packed brown sugar
2 eggs
1 t. vanilla
2 cups all-purpose flour
1 t. baking soda
1 t. salt
1 1/2 t. cinnamon
3 cups quick cooking oats

In a medium bowl, cream together butter and sugars.  Beat in eggs one at a time, then stir in vanilla.  Combine flour, baking soda, salt, and cinnamon; stir into the creamed mixture.  Mix in oats.  Cover and chill for at least an hour.

Preheat oven to 375 degrees.  Place parchment paper on cookie sheets.  Roll dough into walnut-sized balls.  Place on cookie sheet and flatten with a fork dipped in sugar.  Bake for 8-10 minutes (mine went about 10) and let cool on cookie sheet for 5 minutes.  Place on cooling rack.  Enjoy!


Thursday, December 20, 2012

More Time to Bake!

Since we had a snow day today, I've spent a lot of time in the kitchen baking some cookies that I hadn't planned to make!  I have to admit, my cookie stock this year is dominated by chocolate.  I'm going to make some gingersnaps and sugar lollipop cookies over the next few days to try to balance it out a bit.  I did finish up my Oreo Truffles this morning and just have to dip my Chocolate Chip Cookie Dough Truffles later today.  On a whim, I made some Hot Cocoa cookies this morning.  It took a bit to get them right, but in the end they turned out mighty tasty!

Today I thought I'd share the Oreo Truffle recipe with you.  While they aren't difficult, they take a bit of time.  The chocolate dipping is always the most challenging part for me!  

Oreo Truffles

1 package regular Oreos
1 package cream cheese (I used the reduced fat and it worked fine)
1 package Bakers Semi-Sweet Baking Chocolate

Twist open Oreos.  Scrape filling from the middle and put in a bowl.  Place cookies in a Ziploc.  Beat cream cheese and Oreo filling together until creamy.  Finely crush Oreo cookies in the Ziploc and add to filling mixture.  Mix together.  Roll into balls and chill for at least an hour.  (This time I chilled first and rolled into balls. If the other way isn't working, try that route!).  Melt chocolate per package directions.  Dip balls and place on wax covered cookie sheet or jelly roll pan.  Let set and refrigerate.  If you want to get fancy, you can reserve some cookies and sprinkle on top before chocolate is set or drizzle chocolate on top.

Tuesday, December 11, 2012

Some Christmas Book Favorites (and a New Cookie Recipe!)

I have been so busy with the holidays approaching that I've been neglecting the blog for a few days!  Today I thought I'd share with you a few of our favorite Christmas books, as well as a new cookie recipe I tried on Saturday that was delicious (and easy!).

Today our kiddos are receiving a few new Christmas books for their advent bag activity.  This year I was excited to purchase Pete the Cat Saves Christmas by Eric Litwin, because all of the other Pete the Cat books have been a big hit in our house.  A few of our other Christmas favorites are Christmas in the Manger by Nola Buck (this is a board book), Moosteltoe by Margie Palatini, The Grinch Who Stole Christmas by Dr. Seuss, Hurry, Hurry Have You Heard? by Laura Krauss Melmed and Who Is Coming to Our House? by Joseph Slate (also a board book).  We have many more books that the kiddos love to read, but these have stuck out this year!

Saturday I decided to take a stab at a Rolo-stuffed cookie and opted for a chocolate crackle with a roll stuffed inside.  They were delicious!  I can't wait to share them with our families.  Yum!  Today I thought I'd share the recipe with you.  They were quite easy to make!

Rolo-Stuffed Chocolate Cookies
From Two Peas & Their Pod blog

2 1/2 cups all-purpose flour
1 t. baking soda
1/4 t. salt
3/4 c. cocoa
1 cup butter, room temperature
1 cup sugar
1 cup brown sugar
2 eggs
2 t. vanilla
Bag of Rolo candies unwrapped
Sugar (for rolling to dough balls in)

In a medium bowl, sift flour, baking soda, salt, and cocoa.  Set aside.  With a mixer, cream butter and sugars together until smooth.  Mix in eggs one at a time.  Add vanilla next.  Beat until mixed.  Slowly add flour mixture to sugar mixture and blend well.  Take a spoonful of dough and wrap around Rolo.  Roll into ball and then roll in sugar.  Place on a cookie sheet lined with parchment paper and bake at 375 degrees for 7-10 minutes.  Let sit on sheet for an additional 3-5 minutes.  Place on wire rack to cool completely.

All rolled up

Delicious!

Friday, December 7, 2012

One of My Favorite Cookies: Gingersnaps (Edited to Correct Error!)

Just a quick post today!  It's been a busy day picking up the house, cleaning, and wrapping presents.  These days everyone has decided to abandon their naps, so getting things done has become a little trickier!  Thankful there are a lot of cute Christmas shows on tv!

One of my favorite Christmas cookies are Gingersnaps.  I forgot them in my original list I posted earlier this week.  Usually either my mom or I bake them, so we'll see whose list it makes it onto this year.  I thought I'd share the recipe with you.  They are delicious and chewy (not crunchy!).  

Gingersnaps

2 c. flour
2 t. scant baking soda (just a little less than 2 t.)
1/2 t. cinnamon
1/4 t. ginger
3/4 c. butter
1/2 cup white sugar
1/2 cup brown sugar
1 egg
1/4 c. molasses
*extra white sugar in a separate bowl for tops

Cream butter and sugars.  Add egg.  Mix.  Add dry ingredients and stir.  Mix in molasses last and stir until mixed well.  Roll into balls, roll in sugar, and place on parchment-lined cookie sheet.  Flatten with a fork.  Bake at 350 degrees for 7-8 minutes.  Remove from oven and let stand on the cookie sheet to bake a bit more to avoid getting too crispy (if chewy is what you desire).  You may need to tweak the baking time depending on your preference.

Thursday, December 6, 2012

Charitable Giving (and Another Cookie Recipe!)

'Tis the season to load up on gifts for the whole family, but my husband and I think it's equally important to load up on gifts for those who cannot afford them.  I can't imagine how sad it would be for a child to get nothing for Christmas.  It's heartbreaking to think about, but each year we do as much as our budget allows to help others.  While I love to buy for my own children, it really is a special experience to buy for those you don't even know.  

This year we are doing our book family service project.  We ended up purchasing around 60 books and I am very excited about all of the children who will get a new book to call their own.  We will also be donating new toys to Toys for Tots.  I think this is a great program and so "user-friendly," so to speak, because there are drop sites everywhere.  I ordered some items online, but found some great deals on games at Target today that I couldn't pass up.  I hear they are in need of items for older kids, so it's a great opportunity to get some fun games at a good price for that age group.

This year, for the first time, we will be giving some donations as a gift.   Feeding America has a program where you can buy specific foods, so that's what we plan to do.  If you would just like to donate money, though, today your dollar equals three, because for every dollar you donate, Bank of America will donate two more.  What a great way to make your donation go further!  My mother-in-law is buying a goat for all of the grandchildren this year.  A goat, you say?  She is purchasing a goat for a family in Africa.  They can then have milk, cheese, and yogurt.  I think it's a cool lesson for our kiddos!

There are other ways to help out in your community as well.  A teen group at our church and another youth program were in need of cookies for bake sales to raise money for their causes, so given my love to bake, I happily contributed to those!  There's always the Salvation Army bell ringers, too.  My kids love to put money in those pots!  Just hop online and I'm sure you'll find plenty of opportunities for your family to participate in this holiday season and beyond if you so desire.

As promised, I'll include another cookie recipe.  This one is new for me this year.  I made a practice batch last week and tweaked it a bit to make it a little tastier in my opinion.  They may not be the prettiest cookie in the world, but they are yummy!  One of my baking tips:  I always use parchment paper to cover my cookie sheets when baking.  Much less mess to clean up!

Hershey Kiss Surprise
Adapted from the recipe found on the Dip it in Chocolate blog

1/4 c. butter
1 bag semi-sweet chocolate chips
1 can sweeten condensed milk
2 cups flour
1 t. vanilla
Hershey mini kisses (found in baking aisle with chocolate chips)
Powdered sugar
*in lieu of powdered sugar, you can drizzle chocolate on top instead

In microwave, melt butter and semi-sweet chocolate chips.  Cook at 30 second intervals on 60% power stirring each time, until melted and smooth.  Stir in can of sweetened condensed milk.  Add flour and vanilla to make a stiff dough.  Shape 1 level tablespoon around two mini kisses, rolling into a ball.  Roll in powdered sugar.  Bake at 350 degrees for 7-9 minutes.  Cookies may crack on top to indicate they are done, but may not always.  Don't overcook!


Wednesday, December 5, 2012

Cookies! Sweets! My Christmas Treat List

As you know, I love to bake.  Christmas is the perfect excuse to bake away and try some new recipes while I'm at it.  This year my cookie and sweet list includes some new additions I plan to try out.  I am hoping for some good results, but if they are not suitable for others, I guess we'll be stuck with the mistakes...shucks!

So, here is my for-sure cookie list:

Snicker doodles, Andes Mint, Hershey Kiss Surprise, Waffle Iron Turtles (no, these do not have nuts!) and Frosted Sugar Cookies

My "maybes:"

Rolo-stuffed Chocolate Chip, Rainbow Lollipops, Marshmallow Surprise, and Colorful Swirls

My sweets (if time permits):

Oreo Truffles, Chocolate Chip Cookie Dough Truffles, Cake Batter Truffles, Rolo-stuffed Brownie Truffles   

Today I made my husband's favorite cookies:  Andes Mint.  If you are looking for a delicious chocolate cookie recipe that has a little minty twist, this is the one for you.  It's easy and if you roll them the size of a walnut you'll get about 5 1/2 dozen and they freeze wonderfully.  I should mention that when I bake, I have become very partial to Land-o-Lakes unsalted butter.  If you can't find that, stick with an unsalted butter and add the amount of salt that is required in the recipe.

Andes Mint Cookies

3/4 c. butter
1 1/2 c. brown sugar
2 T. water
12 oz. milk chocolate chips
2 eggs
2 3/4 c. flour
1/2 t. salt
1 1/4 t. baking soda
Bag of Andes Mints

In a medium saucepan, melt together the butter, brown sugar, and water; stirring occasionally.  Add the chocolate chips and stir until melted.  Let stand 10 minutes to cool.  Add the remaining ingredients and combine to form a dough.  Chill dough at least one hour.  Roll in walnut-sized balls.  Bake at 350 degrees for 8-9 minutes.  After you take them out of the oven, place half of an Andes Mint on top of each cookie.  Let melt a bit and then spread over cookie with a toothpick.