There are times in life when we have a bit too much on our plate and activities we enjoy get pushed to the side. My blog is one of those activities. I am so thrilled to have recently made the decision to step away from a commitment that was sucking up my time and energy, which will allow me to get back to the things I really love: trying out new recipes, baking, DIY projects, projects for my kids, and more!
To get things rolling again, I want to share a taquito recipe my kids have come to love. It's quick, easy, and budget-friendly. My kids can be a bit picky at times, but they devour this finger food recipe. Let me know what your family thought!
Taquitos
1 pound ground beef
1 clove, garlic
1 cup salsa, more for topping
2 t. chili powder
Shredded cheddar cheese
Flour tortillas
Olive Oil
Brown ground beef and garlic. Add chili powder and salsa and heat through. Place a few spoonfuls of the mixture in tortillas and add some cheddar cheese. Roll up and place seam down in a square baking pan lined with parchment paper. Continue until all meat is used up (I usually make 8 taquitos). Brush with olive oil and bake in the oven at 400 for 8-12 minutes, or until golden brown. They should be a little crispy and easy to pick up!
Let's face it: being a mom is like being a superhero. You better come prepared, because you never know what crisis lies ahead. So grab your capes and let's get to work! I'll share my thoughts on parenting, organization, recipes, books, DIY projects, saving money, and more!
Showing posts with label dinner recipes. Show all posts
Thursday, May 14, 2015
Tuesday, January 7, 2014
A New Dinner Recipe: Goulash
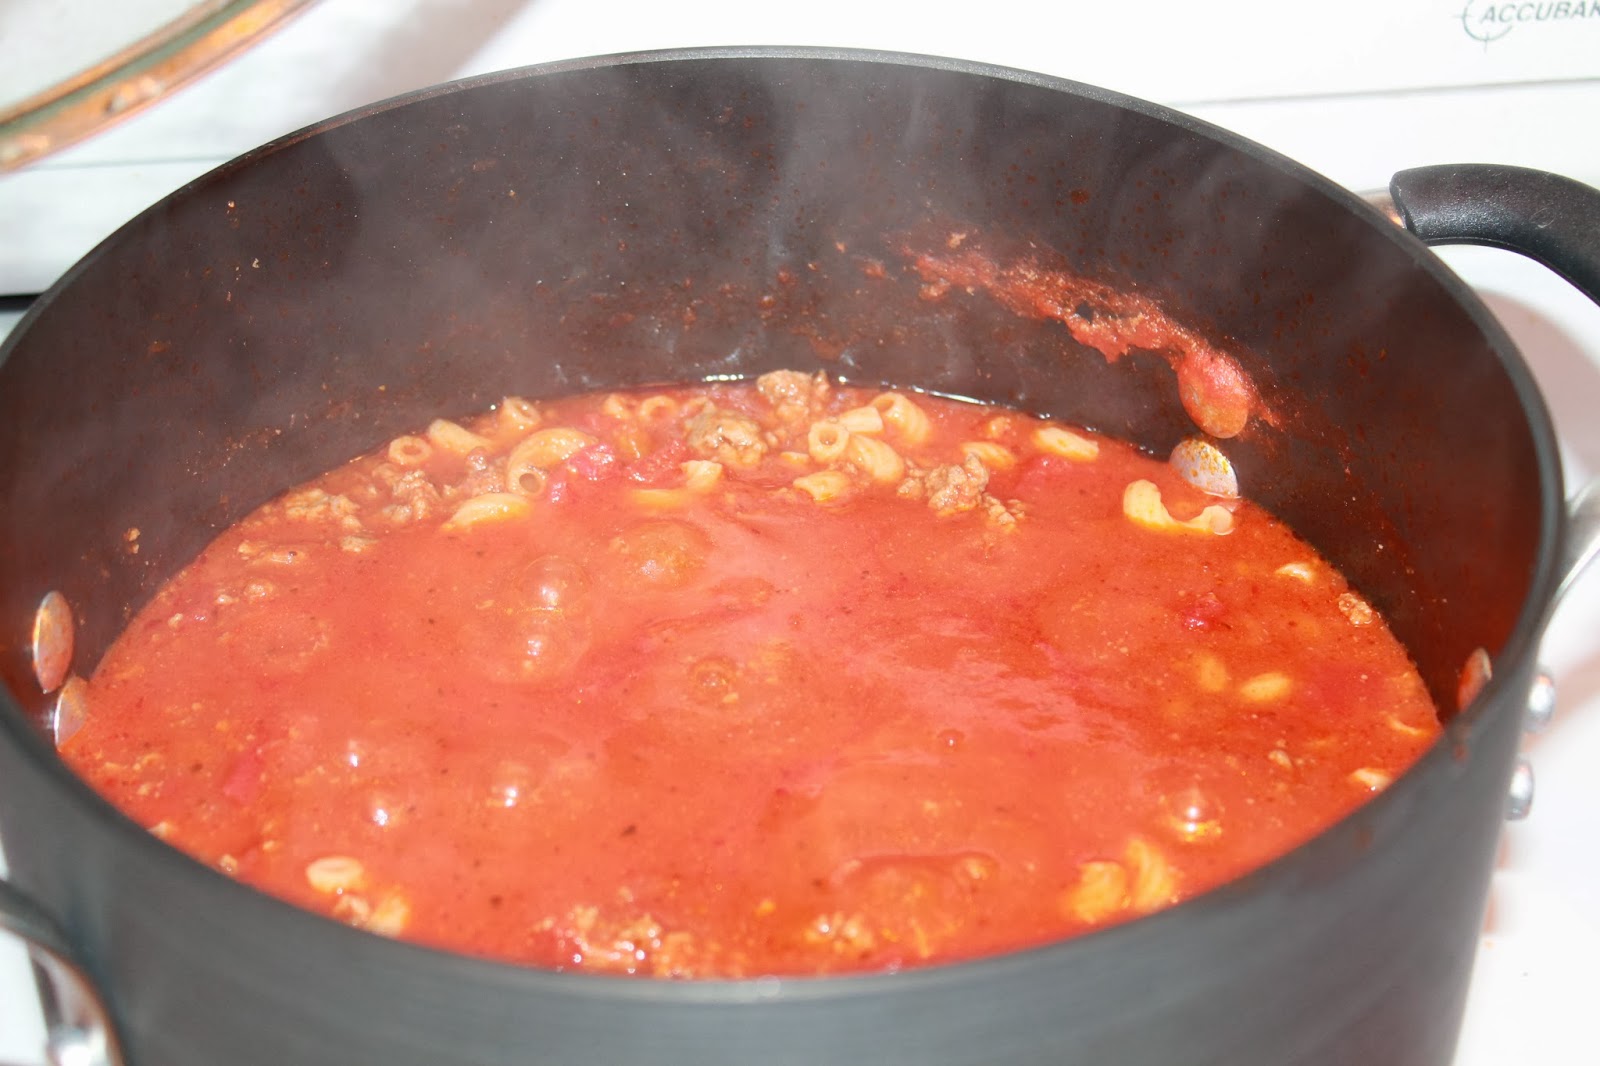
Frequently when I'm scrolling through my Facebook feed I see photos of food shared by other friends. Most times they are for desserts that look sinfully delicious, but occasionally I'll see one that looks promising for a new dinner idea. This recipe for Goulash surfaced a few weeks ago, I pinned it, and decided to give it a try last night. It was delicious (though I made a few adjustments) and will be added to our dinner rotation. It was great for a cold, wintry night!
Goulash
adapted from Paula Deen's Goulash
2 lbs. lean ground beef
1/2 t. garlic (from jar)
3 cups water
2 cans (15 oz.) diced tomatoes (I used petite)
2 cans (15 oz.) tomato sauce
1 T. Italian seasoning
1 bay leaf
2 T. soy sauce
1 t. garlic powder
few shakes of salt
few shakes of pepper
2 c. elbow macaroni
Brown ground beef and drain. Add to large pot, add garlic, and cook for a bit longer. Add remaining ingredients except for macaroni noodles. Simmer for 15-20 minutes. Add macaroni and simmer 20 minutes longer (will thicken during this time). Serve with warm breadsticks.
Goulash
adapted from Paula Deen's Goulash
2 lbs. lean ground beef
1/2 t. garlic (from jar)
3 cups water
2 cans (15 oz.) diced tomatoes (I used petite)
2 cans (15 oz.) tomato sauce
1 T. Italian seasoning
1 bay leaf
2 T. soy sauce
1 t. garlic powder
few shakes of salt
few shakes of pepper
2 c. elbow macaroni
Brown ground beef and drain. Add to large pot, add garlic, and cook for a bit longer. Add remaining ingredients except for macaroni noodles. Simmer for 15-20 minutes. Add macaroni and simmer 20 minutes longer (will thicken during this time). Serve with warm breadsticks.
| Cooking away |
| The finished product! |
Friday, September 20, 2013
You Can Turn Anything into Pie!
A few nights ago, I made Taco Pie for dinner. My mom had made it for the kiddos when they stayed there one night and they all loved it. I figured I'd give it a shot and added my own "cleaner eating" spin on it. Success once again!
While we were eating dinner, my oldest guy said, "Hey, Mom! Adding peas to it makes this like 'Special Pie!'" (That's what I call Chicken Pot Pie to get them to eat it!). This began a conversation about all of the different "pies" we could make for dinner. Here's the list we came up with: Spaghetti Pie, Shepherd's Pie, Chicken Pot Pie, Cheeseburger Pie, and of course, Taco Pie. I'm sure there are plenty more, but the conversation made me feel like I was on some family sitcom or Forrest Gump!
Today I'll share with you the recipe we used for Taco Pie. It's certainly nothing fancy, but a nice little twist on "Mexican Food Night" at home! I mentioned that I added a "cleaner eating" spin to it. In lieu of the prepackaged taco seasoning, I made my own. We also used Organic Blue Corn Chips and crescent rolls made by Immaculate Baking (found at Hy-Vee and cheaper than the regular kind!) that are part of the Non-GMO project. We're also a plain-Jane family, so you may want to add some toppings like lettuce, tomatoes, salsa, etc.
Taco Pie
1 lb. ground beef
2 T. homemade taco seasoning (or a packet from the store)
1 tube crescent rolls
Shredded cheese
Crushed tortilla chips
Brown ground beef and drain. Add taco seasoning and water (1/2 c. if using the homemade seasoning). In a pie pan, place triangles of crescent rolls and knead together to make the crust. Place meat on top of crescent rolls. Top with crushed tortilla chips and cheese. Bake at 375 degrees for 12-15 minutes. Top with favorite taco toppings.
While we were eating dinner, my oldest guy said, "Hey, Mom! Adding peas to it makes this like 'Special Pie!'" (That's what I call Chicken Pot Pie to get them to eat it!). This began a conversation about all of the different "pies" we could make for dinner. Here's the list we came up with: Spaghetti Pie, Shepherd's Pie, Chicken Pot Pie, Cheeseburger Pie, and of course, Taco Pie. I'm sure there are plenty more, but the conversation made me feel like I was on some family sitcom or Forrest Gump!
Today I'll share with you the recipe we used for Taco Pie. It's certainly nothing fancy, but a nice little twist on "Mexican Food Night" at home! I mentioned that I added a "cleaner eating" spin to it. In lieu of the prepackaged taco seasoning, I made my own. We also used Organic Blue Corn Chips and crescent rolls made by Immaculate Baking (found at Hy-Vee and cheaper than the regular kind!) that are part of the Non-GMO project. We're also a plain-Jane family, so you may want to add some toppings like lettuce, tomatoes, salsa, etc.
Taco Pie
1 lb. ground beef
2 T. homemade taco seasoning (or a packet from the store)
1 tube crescent rolls
Shredded cheese
Crushed tortilla chips
Brown ground beef and drain. Add taco seasoning and water (1/2 c. if using the homemade seasoning). In a pie pan, place triangles of crescent rolls and knead together to make the crust. Place meat on top of crescent rolls. Top with crushed tortilla chips and cheese. Bake at 375 degrees for 12-15 minutes. Top with favorite taco toppings.
Thursday, September 5, 2013
Homemade Taco Seasoning
In our attempt to eat more clean and avoid all of the "extras," we have begun to attempt some homemade sauces, marinades, and seasonings. We had great success with our barbecue sauce and teriyaki marinade, so we thought we'd give taco seasoning a try!
On our first attempt, we thought it smelled great and we were excited to try it out. I made tacos and threw in a few tablespoons of the seasoning. Once it was done, I took a little taste-test and yikes! It was spicy! I tried it out on the kids and had to laugh when one of the kiddos grabbed their throat and began to chug milk and the other yelled, "I feel like I ate some hot sauce!"
All right, let's try again! This time we followed the recipe, but cut out the cayenne pepper and reduced the chili powder a bit. I used it to make mexican lasagna and it must have been okay, because everyone scarfed it down. This is definitely a trial and error recipe, as you need to find what heat works for your family, but it's super easy to make and once you figure it out, it would make sense to double or even triple the recipe.
Homemade Taco Seasoning
Adapted from Chef Pablo's Recipe
1 T. chili powder
1 t. paprika
1 t. cumin
1/2 t. ground coriander
1/2 t. oregano
1/4-3/4 t. cayenne pepper (adjust or omit)
1/2 t. garlic powder
1/4 t. onion powder
1 t. sea salt (reduce or omit if desired)
1 t. ground black pepper
Mix together and store in air tight container. Use 2 T. per pound of meat.
If making tacos, add 1/2 cup of water to drained meat. Add seasoning.
On our first attempt, we thought it smelled great and we were excited to try it out. I made tacos and threw in a few tablespoons of the seasoning. Once it was done, I took a little taste-test and yikes! It was spicy! I tried it out on the kids and had to laugh when one of the kiddos grabbed their throat and began to chug milk and the other yelled, "I feel like I ate some hot sauce!"
All right, let's try again! This time we followed the recipe, but cut out the cayenne pepper and reduced the chili powder a bit. I used it to make mexican lasagna and it must have been okay, because everyone scarfed it down. This is definitely a trial and error recipe, as you need to find what heat works for your family, but it's super easy to make and once you figure it out, it would make sense to double or even triple the recipe.
Homemade Taco Seasoning
Adapted from Chef Pablo's Recipe
1 T. chili powder
1 t. paprika
1 t. cumin
1/2 t. ground coriander
1/2 t. oregano
1/4-3/4 t. cayenne pepper (adjust or omit)
1/2 t. garlic powder
1/4 t. onion powder
1 t. sea salt (reduce or omit if desired)
1 t. ground black pepper
Mix together and store in air tight container. Use 2 T. per pound of meat.
If making tacos, add 1/2 cup of water to drained meat. Add seasoning.
Taco Seasoning
Monday, August 19, 2013
Teriyaki Beef Stir Fry
We are back to school and so far, so good. I have been doing my best to be organized in the kitchen: planning meals a few weeks in advance, grocery shopping for those two weeks (except for produce and dairy), and also planning lunches for my little guy to take each day a few weeks in advance. I am not letting him take jelly sandwiches every day. In fact, we are on day #4 of school and he just took his first one! I hope to be able to do a back-to-school post on lunches to send soon. I'm still a work in progress in that department.
Last night we tried a new teriyaki marinade for our beef to make beef stir fry. It was great and is definitely a keeper! In keeping with our eating healthier plan and avoiding GMO products, we used organic canola oil and soy sauce. As with any stir fry, you can throw whatever vegetables in there you'd like. This time we added mushrooms, pea pods, bean sprouts, and carrots to go with the beef. Enjoy!
Beef Teriyaki
Source: Pretty as a Peach (adapted)
1/4 c. canola oil
1/2 c. soy sauce
1/8 c. brown sugar
1/2 t. garlic (add more if you like)
1/4 t. ginger
1/3 c. pineapple juice
1 lb. flank steak
Mix together. Cut up flank steak and place in a Ziploc bag. Pour in marinade and refrigerate for at least 4 hours. In a wok, heat oil. Add carrots and cook about ten minutes. Add mushrooms and beef. Cook until meat is light pink. Add pea pods and bean sprouts. Cook a few minutes longer until they are to desired tenderness. Serve over rice.
Last night we tried a new teriyaki marinade for our beef to make beef stir fry. It was great and is definitely a keeper! In keeping with our eating healthier plan and avoiding GMO products, we used organic canola oil and soy sauce. As with any stir fry, you can throw whatever vegetables in there you'd like. This time we added mushrooms, pea pods, bean sprouts, and carrots to go with the beef. Enjoy!
Beef Teriyaki
Source: Pretty as a Peach (adapted)
1/4 c. canola oil
1/2 c. soy sauce
1/8 c. brown sugar
1/2 t. garlic (add more if you like)
1/4 t. ginger
1/3 c. pineapple juice
1 lb. flank steak
Mix together. Cut up flank steak and place in a Ziploc bag. Pour in marinade and refrigerate for at least 4 hours. In a wok, heat oil. Add carrots and cook about ten minutes. Add mushrooms and beef. Cook until meat is light pink. Add pea pods and bean sprouts. Cook a few minutes longer until they are to desired tenderness. Serve over rice.
Thursday, July 11, 2013
Summer is for Grilling
All of the sudden time seems to be going really fast. It's Thursday and I'm still stuck at least a day behind. We've had a very busy week, though, so it definitely makes the time go faster. We've been busy marking things off of our bucket list the past week. The kids have had a lot of fun and we're over halfway there! How is your summer bucket list coming along?
I have been slacking a bit in the meal preparation department. Being unable to eat dairy really takes the fun out of cooking. You have no idea how good pizza (with cheese!) sounds or some cold ice cream. The things we do for our kiddos, right? I don't want time to go quickly with her, so I will treasure the months ahead, suck it up and try to enjoy eating out of my comfort zone.
Tonight I decided to try something new for dinner: a homemade chicken marinade that I found online. It was really quite simple and contains items you probably have in your pantry. I used some of the new products I purchased that are part of our goal of cleaning up our food and limiting (ideally eliminating) GMO products: organic canola oil and soy sauce. The canola oil I purchased from Amazon and found the organic soy sauce at Target. Since soy and canola are both on the high-risk list, I was pretty excited to find them! I made this recipe for two chicken breasts, but it would easily work for four.
Chicken Marinade
1 cup brown sugar
1 cup oil
1/2 cup soy sauce
1/2 cup vinegar
Mix together with a whisk, pour over chicken, and let marinate for at least four hours. Longer would be best.
I have been slacking a bit in the meal preparation department. Being unable to eat dairy really takes the fun out of cooking. You have no idea how good pizza (with cheese!) sounds or some cold ice cream. The things we do for our kiddos, right? I don't want time to go quickly with her, so I will treasure the months ahead, suck it up and try to enjoy eating out of my comfort zone.
Tonight I decided to try something new for dinner: a homemade chicken marinade that I found online. It was really quite simple and contains items you probably have in your pantry. I used some of the new products I purchased that are part of our goal of cleaning up our food and limiting (ideally eliminating) GMO products: organic canola oil and soy sauce. The canola oil I purchased from Amazon and found the organic soy sauce at Target. Since soy and canola are both on the high-risk list, I was pretty excited to find them! I made this recipe for two chicken breasts, but it would easily work for four.
Chicken Marinade
1 cup brown sugar
1 cup oil
1/2 cup soy sauce
1/2 cup vinegar
Mix together with a whisk, pour over chicken, and let marinate for at least four hours. Longer would be best.
Tuesday, June 25, 2013
Another Dairy-Free Recipe
I'm still on the quest for some yummy dairy-free recipes. This one I'll take credit for myself (which doesn't usually happen!). It's pretty simple and my husband declared we could eat it every week. Must have been good, right?
Awhile back I had purchased some Puff Pastry and threw it in the freezer. A few weeks ago I decided it was time to pull it out and try something with it. I also had some shredded rotisserie chicken in there as well that I had thawed, so I wanted to to use that up too. I originally looked at recipes on puffpastry.com, but I couldn't quickly find anything that used my ingredients and didn't contain dairy. I decided to try my own. This is what I made!
Chicken and Mushrooms Wrapped in Puff Pastry
2-3 cups shredded rotisserie chicken
1 package fresh mushrooms
Olive Oil
Chicken broth
Puff Pastry
Chicken gravy
Saute mushrooms in olive oil. Add chicken and chicken broth. Heat through. I added enough broth to give it some liquid to juice up the chicken, but not too much. Cover a jelly roll pan with parchment paper. Unwrap one sheet of Puff Pastry and roll out a bit. Place in jelly roll pan. Using a slotted spoon, spoon half of the mixture into the middle of the pastry. Wrap the outside around and pinch off the corners. Repeat this with the other sheet. Bake at 400 degrees for 30 minutes or until pastry is golden brown. Let it cool a bit and slice it up. Serve with gravy over the top.
Awhile back I had purchased some Puff Pastry and threw it in the freezer. A few weeks ago I decided it was time to pull it out and try something with it. I also had some shredded rotisserie chicken in there as well that I had thawed, so I wanted to to use that up too. I originally looked at recipes on puffpastry.com, but I couldn't quickly find anything that used my ingredients and didn't contain dairy. I decided to try my own. This is what I made!
Chicken and Mushrooms Wrapped in Puff Pastry
2-3 cups shredded rotisserie chicken
1 package fresh mushrooms
Olive Oil
Chicken broth
Puff Pastry
Chicken gravy
Saute mushrooms in olive oil. Add chicken and chicken broth. Heat through. I added enough broth to give it some liquid to juice up the chicken, but not too much. Cover a jelly roll pan with parchment paper. Unwrap one sheet of Puff Pastry and roll out a bit. Place in jelly roll pan. Using a slotted spoon, spoon half of the mixture into the middle of the pastry. Wrap the outside around and pinch off the corners. Repeat this with the other sheet. Bake at 400 degrees for 30 minutes or until pastry is golden brown. Let it cool a bit and slice it up. Serve with gravy over the top.
Wednesday, May 8, 2013
A New Recipe for a Nursing-Friendly Diet: Chicken Fried Rice
Now that my eating has entered into the "nursing-friendly" phase, I've been on the hunt for some dairy-free recipes and pinning to Pinterest like crazy. I also have to omit some other things, like garlic, onion, and peppers, but that is easy enough to do.
Today I thought I'd try out a Chicken Fried Rice recipe I had come across. It was fairly simple (bonus!) and turned out pretty well. We aren't able to order Chinese food anymore, because it is not safe for our oldest son with his peanut and tree nut allergy, so it's nice to have something similar to a restaurant.
Here is the recipe. I will include all of the ingredients that the recipe called for, but note the items I omitted or changed.
Chicken Fried Rice
2 cups prepared rice
1 chicken breast, cut up (I used two cups of chicken that I had cooked and cut up ahead of time; season with salt and pepper if desired)
1/2 cup frozen mixed vegetables (I used peas and carrots)
2 green onions, chopped (I omitted)
1 clove garlic, minced ( I omitted)
1 egg
3 teaspoons sesame or wok oil, divided (I used olive oil and used two tablespoons because I initially read the recipe wrong!)
2 T. soy sauce (I used low sodium)
Whisk egg and 1 teaspoon (or tablespoon!) oil in a bowl. Set aside. Heat one teaspoon (or tablespoon!) oil in a wok over medium high heat. Add chicken and stir fry until cooked. Set aside. Add another teaspoon of oil to the wok, and add frozen vegetables (and green onions if desired). Stir fry until tender, about two minutes (though it took me about 5!). If using garlic, add and cook for another 30 seconds. Push vegetables to the side in the wok and pour in egg mixture into the center and scramble. Add cooked chicken, rice, and soy sauce to wok and then toss well to combine.
Today I thought I'd try out a Chicken Fried Rice recipe I had come across. It was fairly simple (bonus!) and turned out pretty well. We aren't able to order Chinese food anymore, because it is not safe for our oldest son with his peanut and tree nut allergy, so it's nice to have something similar to a restaurant.
Here is the recipe. I will include all of the ingredients that the recipe called for, but note the items I omitted or changed.
Chicken Fried Rice
2 cups prepared rice
1 chicken breast, cut up (I used two cups of chicken that I had cooked and cut up ahead of time; season with salt and pepper if desired)
1/2 cup frozen mixed vegetables (I used peas and carrots)
2 green onions, chopped (I omitted)
1 clove garlic, minced ( I omitted)
1 egg
3 teaspoons sesame or wok oil, divided (I used olive oil and used two tablespoons because I initially read the recipe wrong!)
2 T. soy sauce (I used low sodium)
Whisk egg and 1 teaspoon (or tablespoon!) oil in a bowl. Set aside. Heat one teaspoon (or tablespoon!) oil in a wok over medium high heat. Add chicken and stir fry until cooked. Set aside. Add another teaspoon of oil to the wok, and add frozen vegetables (and green onions if desired). Stir fry until tender, about two minutes (though it took me about 5!). If using garlic, add and cook for another 30 seconds. Push vegetables to the side in the wok and pour in egg mixture into the center and scramble. Add cooked chicken, rice, and soy sauce to wok and then toss well to combine.
Thursday, March 7, 2013
Prepping For Baby: Meals!
With about a month to go, I decided it was time to sit down and plan out our meals and put together a large grocery list. While I am doing this to prep for the month after the baby is born, you could easily do this in your everyday life as well. It takes time and organization, but it will pay off in the end. We will not be eating frozen food and take-out, but some of our favorite homemade meals. Today I'll share with you our menu list and some tips on how to make meal planning easier! I am not planning to freeze any of these meals in advance. I will just have all of the ingredients on hand.
The first thing I did was look through my recipes to find the most time-efficient and simple meals I could find. My goal was to come up with at least one month's worth of meals for both lunch and dinner, as well as breakfast, snacks and some special treats I don't usually buy for the kids during this transition time.
Planning lunch was pretty simple, as our kids are pretty partial to the same old rotation of meals: jelly, Sunbutter/jelly, deli meat, or grilled cheese sandwiches; quesadillas, hot dogs (I like to buy the no nitrate turkey dogs), tomato soup, and macaroni and cheese. We'll have leftovers, too, if they're available. For myself (since my kiddos won't eat it), I'm going to have some cooked turkey on hand in the freezer for turkey and gravy over mashed potatoes (YUM!).
Putting together our dinner options and list took a little more time. Every Friday we have homemade pizza, so that was an easy one (and four meals-bonus!). I also like to have breakfast for dinner on Thursday nights, so we'll rotate through homemade french toast, pancakes, and waffles for those meals. One night a week, usually Monday, I like to do a crockpot recipe, so I chose Italian Beef and BBQ pulled pork sandwiches and chicken tacos. I plan to make the chicken tacos twice and use the meat to make enchiladas one night. It's just an easy way to cook the chicken and it's very flavorful.
I'm a big fan of casseroles, so of course I will be incorporating those into my menu. One of the easiest ways to make the casserole prep work quick is to cook and cube the chicken ahead of time. I put two cups in Ziploc and put them in the freezer. I usually find that this amount is enough to suffice for most of my recipes. I chose the following casserole recipes: Cheesy Chicken (which I can make the night before which is a bonus!), Chicken Tetrazzini, Turkey Tetrazzini, Spaghetti Pie, Shepherd's Pie, Tator Tot, and Chicken and Rice. Most of these are easy to have supplies on hand for. You'll need your soups, pastas, frozen vegetables and potatoes, and other odds and ends that you can buy ahead of time.
I've also included Spaghetti, Baked Mostaccioli, Sloppy Joe's, Tacos, Chicken Pot Pie, Ribs, Oven BBQ Chicken Drumsticks, and BBQ Chicken Sandwiches. Of course, I put in a few of the kids' favorites for our Saturday fun night: Mummy Hot Dogs, Fish Sticks, and popcorn and apples. I also hope the weather gets warmer, so my husband can grill! I bought steaks, a pork tenderloin, and chicken drumsticks for that purpose!
This seems like a lot of food! Maybe it will last longer that a month, but I would rather be over-prepared than under! I have all of the meat we will need stored in our big deep freezer as well as vegetables for sides. We have more than enough juice, cereal, and oatmeal to last and I will be stocking our freezer with a variety of muffins and breakfast breads as well to change things up a bit. We'll still have to go to the grocery store weekly, but for the most part we will just need milk, bread, fresh fruits and vegetables, yogurt, and cottage cheese. I think I'm going to get spoiled. Maybe I'll try to keep this up to an extent!
The majority of the recipes that I've included in this post are on my blog. You can search by their names to find them. Today I will include a recipe that we had this week. It's very simple and our kids love it!
BBQ Chicken Sandwiches
4 chicken breasts
1 12 oz. can 7-Up
1 bottle of your favorite BBQ sauce
Place chicken in a skillet. Mix together 7-Up and BBQ sauce. Pour over chicken. Bring to a boil and simmer for one hour, covering the skillet. Remove the chicken from the skillet and shred in a bowl or pan. Pour the liquid in and mix together.
The first thing I did was look through my recipes to find the most time-efficient and simple meals I could find. My goal was to come up with at least one month's worth of meals for both lunch and dinner, as well as breakfast, snacks and some special treats I don't usually buy for the kids during this transition time.
Planning lunch was pretty simple, as our kids are pretty partial to the same old rotation of meals: jelly, Sunbutter/jelly, deli meat, or grilled cheese sandwiches; quesadillas, hot dogs (I like to buy the no nitrate turkey dogs), tomato soup, and macaroni and cheese. We'll have leftovers, too, if they're available. For myself (since my kiddos won't eat it), I'm going to have some cooked turkey on hand in the freezer for turkey and gravy over mashed potatoes (YUM!).
Putting together our dinner options and list took a little more time. Every Friday we have homemade pizza, so that was an easy one (and four meals-bonus!). I also like to have breakfast for dinner on Thursday nights, so we'll rotate through homemade french toast, pancakes, and waffles for those meals. One night a week, usually Monday, I like to do a crockpot recipe, so I chose Italian Beef and BBQ pulled pork sandwiches and chicken tacos. I plan to make the chicken tacos twice and use the meat to make enchiladas one night. It's just an easy way to cook the chicken and it's very flavorful.
I'm a big fan of casseroles, so of course I will be incorporating those into my menu. One of the easiest ways to make the casserole prep work quick is to cook and cube the chicken ahead of time. I put two cups in Ziploc and put them in the freezer. I usually find that this amount is enough to suffice for most of my recipes. I chose the following casserole recipes: Cheesy Chicken (which I can make the night before which is a bonus!), Chicken Tetrazzini, Turkey Tetrazzini, Spaghetti Pie, Shepherd's Pie, Tator Tot, and Chicken and Rice. Most of these are easy to have supplies on hand for. You'll need your soups, pastas, frozen vegetables and potatoes, and other odds and ends that you can buy ahead of time.
I've also included Spaghetti, Baked Mostaccioli, Sloppy Joe's, Tacos, Chicken Pot Pie, Ribs, Oven BBQ Chicken Drumsticks, and BBQ Chicken Sandwiches. Of course, I put in a few of the kids' favorites for our Saturday fun night: Mummy Hot Dogs, Fish Sticks, and popcorn and apples. I also hope the weather gets warmer, so my husband can grill! I bought steaks, a pork tenderloin, and chicken drumsticks for that purpose!
This seems like a lot of food! Maybe it will last longer that a month, but I would rather be over-prepared than under! I have all of the meat we will need stored in our big deep freezer as well as vegetables for sides. We have more than enough juice, cereal, and oatmeal to last and I will be stocking our freezer with a variety of muffins and breakfast breads as well to change things up a bit. We'll still have to go to the grocery store weekly, but for the most part we will just need milk, bread, fresh fruits and vegetables, yogurt, and cottage cheese. I think I'm going to get spoiled. Maybe I'll try to keep this up to an extent!
The majority of the recipes that I've included in this post are on my blog. You can search by their names to find them. Today I will include a recipe that we had this week. It's very simple and our kids love it!
BBQ Chicken Sandwiches
4 chicken breasts
1 12 oz. can 7-Up
1 bottle of your favorite BBQ sauce
Place chicken in a skillet. Mix together 7-Up and BBQ sauce. Pour over chicken. Bring to a boil and simmer for one hour, covering the skillet. Remove the chicken from the skillet and shred in a bowl or pan. Pour the liquid in and mix together.
Monday, March 4, 2013
Comfort Food Monday: No-Fuss Beef Stroganoff
We are preparing for another round of snow today and catching up from a very unproductive weekend since I spent the whole weekend down for the count. While my kiddos seems to get sick often and spread their germs, I have been fortunate to escape many of their ailments. Unfortunately, the stomach flu got the best of me this time. It couldn't have struck at a worse time: nearly 8 months pregnant and on the one night I actually had plans, fun plans, to see Maroon 5. Oh well! We were lucky that my parents were able to take our older two for the weekend and my husband had some serious one-on-one time with our youngest. We made it work and now time will tell if my husband will be the only victim to escape!
I am freaking out a bit that our baby is scheduled to arrive in about a month, as we have a lot to do to prepare yet. It is my goal to get some more things washed up this week and pull out some of the "gear." Last week I had several boxes of diapers and wipes delivered (I love internet shopping!) and took some time to hit Babies R Us and Target to get some other essentials. The nursery really needs to be painted soon so we can start organizing and putting everything together. I know it will all work out. It would just be better if it were sooner rather than later! With our first child, we had the nursery painted and started decorating by the end of the first trimester! Funny how you don't have as much time when there are more kids running around (ha!).
Simple meals will be beneficial once the little one arrives. One of my to-do list projects is to cook up a bunch of chicken, cube it, and freeze it for casserole recipes. It is such a time-saver and really helps us eat some decent meals during the crazy transition time. I also plan to bake some breakfast breads and muffins, so we can switch things up a bit.
Today I'd like to share a recipe for Beef Stroganoff. It is very simple and one of my favorites!
No-Fuss Beef Stroganoff
1 lb. ground beef
1 can cream of mushroom soup
1 can mushrooms or use fresh
8-12 oz. sour cream
Egg noodles, about 3/4 package
Brown ground beef in a skillet and drain grease. Add cream of mushroom soup and mushrooms (if using fresh, saute first) and simmer. Add sour cream (make as saucy as you prefer) and turn down the heat to avoid scorching. Stir until heated through. Serve over hot egg noodles.
I am freaking out a bit that our baby is scheduled to arrive in about a month, as we have a lot to do to prepare yet. It is my goal to get some more things washed up this week and pull out some of the "gear." Last week I had several boxes of diapers and wipes delivered (I love internet shopping!) and took some time to hit Babies R Us and Target to get some other essentials. The nursery really needs to be painted soon so we can start organizing and putting everything together. I know it will all work out. It would just be better if it were sooner rather than later! With our first child, we had the nursery painted and started decorating by the end of the first trimester! Funny how you don't have as much time when there are more kids running around (ha!).
Simple meals will be beneficial once the little one arrives. One of my to-do list projects is to cook up a bunch of chicken, cube it, and freeze it for casserole recipes. It is such a time-saver and really helps us eat some decent meals during the crazy transition time. I also plan to bake some breakfast breads and muffins, so we can switch things up a bit.
Today I'd like to share a recipe for Beef Stroganoff. It is very simple and one of my favorites!
No-Fuss Beef Stroganoff
1 lb. ground beef
1 can cream of mushroom soup
1 can mushrooms or use fresh
8-12 oz. sour cream
Egg noodles, about 3/4 package
Brown ground beef in a skillet and drain grease. Add cream of mushroom soup and mushrooms (if using fresh, saute first) and simmer. Add sour cream (make as saucy as you prefer) and turn down the heat to avoid scorching. Stir until heated through. Serve over hot egg noodles.
Friday, March 1, 2013
No Meat Friday: Orange Roughy
Since yesterday's post was a little heavy and emotional, I thought I'd keep today's brief and provide a yummy fish recipe. My mom always made this when I was growing up during Lent and I just came across it the other day. It is intended for the microwave, but I have always baked it.
Orange Roughy
1 lb. fish
salt and pepper
2 T. butter
1 T. lemon juice
1 t. grated onion
If using fresh, cut fish into serving pieces. If using frozen, thaw filets. Microwave butter, lemon juice, and onion in glass measuring cup until melted. Arrange fish in ungreased baking dish. Sprinkle with salt and pepper. Pour butter mixture over the fish and microwave until fish flakes easily with fork, 4 to 4 1/2 minutes.
*My oven method: Follow all of the same steps, except bake at 450 degrees for 10 minutes or until fish flakes. (Keep checking with a fork to not overcook).
*You could also substitute cod, halibut, haddock, and sole if you're looking for a mild fish.
Orange Roughy
1 lb. fish
salt and pepper
2 T. butter
1 T. lemon juice
1 t. grated onion
If using fresh, cut fish into serving pieces. If using frozen, thaw filets. Microwave butter, lemon juice, and onion in glass measuring cup until melted. Arrange fish in ungreased baking dish. Sprinkle with salt and pepper. Pour butter mixture over the fish and microwave until fish flakes easily with fork, 4 to 4 1/2 minutes.
*My oven method: Follow all of the same steps, except bake at 450 degrees for 10 minutes or until fish flakes. (Keep checking with a fork to not overcook).
*You could also substitute cod, halibut, haddock, and sole if you're looking for a mild fish.
Friday, February 22, 2013
No Meat Fridays? Shrimp Boil!
I'm not going to lie...we should not be eating meat on Fridays, but we have gotten pretty bad about this since we've had kids. Generally, I like to just make one meal for everyone and our kids are not big fans of fish (except for fish sticks!) and now we have a possible shellfish allergy to add to it. It's definitely a Mom and Dad meal, but we eat early these days. I could just serve cheese quesadillas, tomato soup and grilled cheese, macaroni and cheese, or cheese pizza, but I don't. Maybe I'll make it a goal for next year!
I will share with you, though, my favorite shrimp boil recipe. We eat this every year with my parents for our Christmas celebration. I could sure go for some tonight!
Shrimp Boil
6 cups water
2 T. salt
2 T. vinegar
2 bay leaves
2 stalks celery
Fresh shrimp with the shell on, however many pounds you plan to eat!
Combine all ingredients except shrimp. Bring to boil. Add 1/2 pound to 1 pound of shrimp at a time. Cook until pink (about 2-3 minutes generally). Remove shrimp with slotted spoon. Repeat as necessary, bringing water to a boil each time.
Serve with warm butter and cocktail sauce if desired.
I will share with you, though, my favorite shrimp boil recipe. We eat this every year with my parents for our Christmas celebration. I could sure go for some tonight!
Shrimp Boil
6 cups water
2 T. salt
2 T. vinegar
2 bay leaves
2 stalks celery
Fresh shrimp with the shell on, however many pounds you plan to eat!
Combine all ingredients except shrimp. Bring to boil. Add 1/2 pound to 1 pound of shrimp at a time. Cook until pink (about 2-3 minutes generally). Remove shrimp with slotted spoon. Repeat as necessary, bringing water to a boil each time.
Serve with warm butter and cocktail sauce if desired.
Thursday, February 21, 2013
Creamy Swiss Steak
My blog has been so neglected. Now that the big birthday and vacation are over, I'm hoping I can get back to posting more regularly before our next big life change in April (or earlier if I'm lucky!). We had a great vacation, but not without some hitches along the way. The weather was not great most days, we had a child who kept randomly vomiting (at very inopportune times might I add), and of course, some sleep trouble, but we survived and everyone had fun. That's what counts in the end!
Today I had to spend my morning out running errands before the snow comes and now we will be hunkered down for a few days at home. I am looking forward to three days of nothing to do (my oldest doesn't have school tomorrow regardless of the snow totals due to kindergarten round-up)! Tonight we are going to have creamy swiss steak. This is a pretty simple recipe and our local grocery store had a pretty good deal on cube steaks, so we're going to make it work!
Creamy Swiss Steak (from food.com)
4 minute steaks (we are substituting cube tonight)
oil, for frying
salt
flour, for dredging
2 cans cream of mushroom soup
1 10 oz. can milk (I just use what's in our refrigerator)
1 4 oz. can of mushrooms or 1/2 pound fresh mushrooms
1 tablespoon butter
Slice mushrooms (if fresh) and saute in butter. If using a can, drain well and set aside. In a large skillet, heat oil. Salt minute steaks and dredge in flour. Fry until brown. Make sure when you are frying you leave the meat on long enough for the breading to fry until sets, as it will fall off if not fried long enough. When the meat is fried, place on paper towels to drain excess oil. Place in 2 quart casserole dish to keep warm. Leave 2 tablespoons oil in the frying pan and remove the rest. Add cream of mushroom soup, milk, and mushrooms, stirring constantly. Let soup simmer on medium-low heat until heated through. Pour over warm meat and serve. We eat it with mashed potatoes. Yum!
Today I had to spend my morning out running errands before the snow comes and now we will be hunkered down for a few days at home. I am looking forward to three days of nothing to do (my oldest doesn't have school tomorrow regardless of the snow totals due to kindergarten round-up)! Tonight we are going to have creamy swiss steak. This is a pretty simple recipe and our local grocery store had a pretty good deal on cube steaks, so we're going to make it work!
Creamy Swiss Steak (from food.com)
4 minute steaks (we are substituting cube tonight)
oil, for frying
salt
flour, for dredging
2 cans cream of mushroom soup
1 10 oz. can milk (I just use what's in our refrigerator)
1 4 oz. can of mushrooms or 1/2 pound fresh mushrooms
1 tablespoon butter
Slice mushrooms (if fresh) and saute in butter. If using a can, drain well and set aside. In a large skillet, heat oil. Salt minute steaks and dredge in flour. Fry until brown. Make sure when you are frying you leave the meat on long enough for the breading to fry until sets, as it will fall off if not fried long enough. When the meat is fried, place on paper towels to drain excess oil. Place in 2 quart casserole dish to keep warm. Leave 2 tablespoons oil in the frying pan and remove the rest. Add cream of mushroom soup, milk, and mushrooms, stirring constantly. Let soup simmer on medium-low heat until heated through. Pour over warm meat and serve. We eat it with mashed potatoes. Yum!
Monday, February 4, 2013
Comfort Food Monday
Happy Monday! We're getting ready to head off to school, but I wanted to share a macaroni and cheese recipe with you on this cold Monday! I have served this at birthday parties before and it was a hit!
Macaroni and Cheese
1 8 oz. package elbow macaroni
8 oz. shredded sharp cheddar cheese
12 oz. small curd cottage cheese
8 oz. sour cream
1/4 c. parmesan cheese
salt/pepper to taste
1 c. dry bread crumbs
1/4 cup butter, melted
Cook pasta and drain. Stir together noodles, cheese, cottage, cheese, sour cream, parmesan cheese, and salt/pepper. Mix melted butter and breadcrumbs and place on top. Bake at 350 degrees for 30-35 minutes, or until bubbly.
Macaroni and Cheese
1 8 oz. package elbow macaroni
8 oz. shredded sharp cheddar cheese
12 oz. small curd cottage cheese
8 oz. sour cream
1/4 c. parmesan cheese
salt/pepper to taste
1 c. dry bread crumbs
1/4 cup butter, melted
Cook pasta and drain. Stir together noodles, cheese, cottage, cheese, sour cream, parmesan cheese, and salt/pepper. Mix melted butter and breadcrumbs and place on top. Bake at 350 degrees for 30-35 minutes, or until bubbly.
Friday, February 1, 2013
Spaghetti Meatballs
It's Friday! It's freezing! Today my sweet little girl has her surgery and Daddy will be taking her in while I stay at home with my boys. This is going to be a hard morning for this mama, but it's what has to be done. I've packed a fun little bag for her of books, favorite little stuffed animals, and a new My Little Pony she's been begging for. I hope all goes smoothly and she isn't too afraid!
One of our favorite meals is spaghetti. We make it often and though we haven't done it in awhile, it is fun to switch it up at times by omitting the meat from the sauce and making meatballs instead! I haven't made these in such a long time that I think it's time to add it to the menu next week. While I have always made these with ground beef, I'm sure you could substitute ground turkey.
Meatballs
1 lb. ground beef
2 eggs, lightly beaten
3/4 c. Italian bread crumbs
1/4 c. parmesan cheese
1 1/2 t. salt
1/8-1/4 t. pepper
1/3 c. water
Mix all ingredients together and form into balls. Cook on stovetop in a pan with hot oil until brown and cooked through. Serve over top of cooked noodles and top with spaghetti sauce.
One of our favorite meals is spaghetti. We make it often and though we haven't done it in awhile, it is fun to switch it up at times by omitting the meat from the sauce and making meatballs instead! I haven't made these in such a long time that I think it's time to add it to the menu next week. While I have always made these with ground beef, I'm sure you could substitute ground turkey.
Meatballs
1 lb. ground beef
2 eggs, lightly beaten
3/4 c. Italian bread crumbs
1/4 c. parmesan cheese
1 1/2 t. salt
1/8-1/4 t. pepper
1/3 c. water
Mix all ingredients together and form into balls. Cook on stovetop in a pan with hot oil until brown and cooked through. Serve over top of cooked noodles and top with spaghetti sauce.
Monday, January 28, 2013
Comfort Food Monday!
Quick post today. We have a lot of baking to do, but I am procrastinating. Today I am focusing on breakfast foods to put in the freezer: banana chocolate chip muffins, banana bread, and lemon bread. I am so hungry and can't wait to dive into some of our goodies!
Given our dreary weather today, I thought I'd share with you one of my favorite recipes from my childhood. It doesn't look pretty, but it tastes delicious! We always called it mashed potato casserole, but most know it as Shepherds Pie.
Shepherds Pie
1 pound ground beef
1 can tomato soup
1 can cut green beans
Cooked instant mashed potatoes (make amount to serve 4-6)
Shredded Colby Jack cheese
Brown ground beef. In a bowl, mix ground beef, soup, and beans. Put in casserole dish and top with potatoes. Sprinkle cheese on top (the cheesier the better in my opinion!). Bake at 350 degrees for 30-35 minutes, or until bubbly.
Given our dreary weather today, I thought I'd share with you one of my favorite recipes from my childhood. It doesn't look pretty, but it tastes delicious! We always called it mashed potato casserole, but most know it as Shepherds Pie.
Shepherds Pie
1 pound ground beef
1 can tomato soup
1 can cut green beans
Cooked instant mashed potatoes (make amount to serve 4-6)
Shredded Colby Jack cheese
Brown ground beef. In a bowl, mix ground beef, soup, and beans. Put in casserole dish and top with potatoes. Sprinkle cheese on top (the cheesier the better in my opinion!). Bake at 350 degrees for 30-35 minutes, or until bubbly.
Thursday, January 17, 2013
Cranberry Chicken
I have been so thankful to be back near my parents again. My mom has spent a lot of time at our house the past week, as I have not been feeling well with some pregnancy issues. After some blood work and my routine trip to the doctor, we've come to the conclusion that I am having trouble with low blood sugar, iron, and blood pressure. Add into the equation a teething toddler, illness, and many nights of little sleep and my body decided to let me know it had had enough! Mom to the rescue! She's spent many days and even a few nights here when my husband has been gone. She's made us yummy food (homemade chicken soup...Yum!), grocery shopped, played with the kids, and helped pick up the house. I could not be more grateful for all of her help.
This is also the reason my posts have been less frequent. Today I thought I'd share a recipe with you that is one of my husband's favorites. It's a nice twist on chicken and probably a recipe you haven't seen before!
Cranberry Chicken
1 8 oz. bottle Catalina salad dressing
1 16 oz. can whole berry cranberry sauce
1 package Lipton onion soup mix
4 boneless, skinless chicken breasts
Mix together salad dressing, cranberry sauce and soup. Mix well. Add chicken breasts and transfer to a glass baking dish. Bake at 350 degrees for 30-45 minutes covered. Uncover and bake 15-30 minutes more.
Usually we serve with this with a side of rice and spinach.
This is also the reason my posts have been less frequent. Today I thought I'd share a recipe with you that is one of my husband's favorites. It's a nice twist on chicken and probably a recipe you haven't seen before!
Cranberry Chicken
1 8 oz. bottle Catalina salad dressing
1 16 oz. can whole berry cranberry sauce
1 package Lipton onion soup mix
4 boneless, skinless chicken breasts
Mix together salad dressing, cranberry sauce and soup. Mix well. Add chicken breasts and transfer to a glass baking dish. Bake at 350 degrees for 30-45 minutes covered. Uncover and bake 15-30 minutes more.
Usually we serve with this with a side of rice and spinach.
Friday, January 11, 2013
Date Night? What's That? Bring it Home!
In my mind (and out loud), I always say that my husband and I need to have more date nights. Please note I did not say want, I said need. Time away from the kiddos is important to every marriage. It's just hard to make it work a lot of the time. There's the childcare, the money, oh, and the energy it takes to go and actually do it. With three young children and one baking away sucking all of my energy out of me, going out seems like quite a hurdle to overcome. So, it's time to get creative and bring the date night home.
Here's an example of a date night idea. Let's start with dinner. This could include the kiddos or not, depending on your preference. If I had to wait to eat until all of my kids were snoring away, I would be starving and crabby! So, for the purposes of this date night, dinner will be with the munchkins. Luckily I have a wonderful (this word barely touches the surface of how good this is!) recipe that our entire family devours: Portobello Stuffed Shells. Yum, yum, yum! Pair this with a side of salad and bread and you're set. You could also make a nice little dessert (or have your husband stop for a few slices of pie) and have a restaurant night at home!
Once you've had dinner and put the kiddos to bed, it's time to find some activity to enjoy together. To each his own in this area, but our date night would either include a movie (which I'd probably fall asleep during) or a game. We like to play Scrabble and I hate to admit that I have lost the last two times we have played. It's got me motivated for another round! The best (and maybe most important) part of the night, though, would be to actually sit down and have a conversation. Check in with each other and see how things are going. It's definitely something we don't do enough, because it feels like we never have enough time!
Go on! Have a date night at home (and let me know how you like this recipe!). Happy Friday!
Portobello Stuffed Shells
2 packages Portobello mushrooms (finely chopped)
1 c. whipping cream
1 1/2 c. shredded Mozzarella cheese (divided)
2 scallions (finely chopped)
1 package shells
salt/pepper
1 t. chopped garlic (once again, I use the stuff in the jar!)
1/4 stick of butter
Jar of favorite marinara sauce (I use organic Barilla tomato and basil )
Cook shells. Saute mushrooms, scallions and garlic in butter. Add salt/pepper to taste. Scoop mushroom mixture out with slotted spoon and put in bowl. Add whipping cream and 1 cup cheese to liquid in skillet. Simmer and stir. Drain and rinse shells in cold water. Stuff shells with mushroom mixture. Pour whipping cream sauce over shells. Pour marinara sauce on top and sprinkle with remaining 1/2 cup of cheese. Bake at 350 degrees about 30 minutes until cheese is melted and shells are warm.
Here's an example of a date night idea. Let's start with dinner. This could include the kiddos or not, depending on your preference. If I had to wait to eat until all of my kids were snoring away, I would be starving and crabby! So, for the purposes of this date night, dinner will be with the munchkins. Luckily I have a wonderful (this word barely touches the surface of how good this is!) recipe that our entire family devours: Portobello Stuffed Shells. Yum, yum, yum! Pair this with a side of salad and bread and you're set. You could also make a nice little dessert (or have your husband stop for a few slices of pie) and have a restaurant night at home!
Once you've had dinner and put the kiddos to bed, it's time to find some activity to enjoy together. To each his own in this area, but our date night would either include a movie (which I'd probably fall asleep during) or a game. We like to play Scrabble and I hate to admit that I have lost the last two times we have played. It's got me motivated for another round! The best (and maybe most important) part of the night, though, would be to actually sit down and have a conversation. Check in with each other and see how things are going. It's definitely something we don't do enough, because it feels like we never have enough time!
Go on! Have a date night at home (and let me know how you like this recipe!). Happy Friday!
Portobello Stuffed Shells
2 packages Portobello mushrooms (finely chopped)
1 c. whipping cream
1 1/2 c. shredded Mozzarella cheese (divided)
2 scallions (finely chopped)
1 package shells
salt/pepper
1 t. chopped garlic (once again, I use the stuff in the jar!)
1/4 stick of butter
Jar of favorite marinara sauce (I use organic Barilla tomato and basil )
Cook shells. Saute mushrooms, scallions and garlic in butter. Add salt/pepper to taste. Scoop mushroom mixture out with slotted spoon and put in bowl. Add whipping cream and 1 cup cheese to liquid in skillet. Simmer and stir. Drain and rinse shells in cold water. Stuff shells with mushroom mixture. Pour whipping cream sauce over shells. Pour marinara sauce on top and sprinkle with remaining 1/2 cup of cheese. Bake at 350 degrees about 30 minutes until cheese is melted and shells are warm.
Tuesday, January 8, 2013
Comfort Food: Chicken Pot Pie
Just a quick post today! There are times when comfort food recipes come in handy. Whether it be a dreary day, a meal for a new mom or family who needs assistance, or just because you feel like it, this recipe is a good one for any occasion. Not too hard to put together and yummy!
Chicken Pot Pie
1 carton Pacific Foods organic cream of chicken soup
1/3 cup milk
2 cups chicken, cooked and cubed (I recommend Rotisserie!)
1/2 cup shredded Mozzarella
Any herbs (thyme, parsley, sage)
Frozen veggies to taste (slightly thawed): green beans, peas, carrots, potatoes; I just dump in to make enough filling
Frozen pie crust
Mix together soup, milk, chicken, herbs, and veggies. Put in pie crust (place on cookie sheet for less mess). Bake at 400 degrees for 40 minutes or until bubbly. You may want to check it around 30 minutes and place foil over top if pie crust is getting too brown. Sprinkle cheese on top near the end of cook time and cook until melted.
Chicken Pot Pie
1 carton Pacific Foods organic cream of chicken soup
1/3 cup milk
2 cups chicken, cooked and cubed (I recommend Rotisserie!)
1/2 cup shredded Mozzarella
Any herbs (thyme, parsley, sage)
Frozen veggies to taste (slightly thawed): green beans, peas, carrots, potatoes; I just dump in to make enough filling
Frozen pie crust
Mix together soup, milk, chicken, herbs, and veggies. Put in pie crust (place on cookie sheet for less mess). Bake at 400 degrees for 40 minutes or until bubbly. You may want to check it around 30 minutes and place foil over top if pie crust is getting too brown. Sprinkle cheese on top near the end of cook time and cook until melted.
Saturday, January 5, 2013
Easy Sunday Meal: Ribs!
Happy Saturday! It's been a lazy day around our house thanks to a 4:15 A.M. wake-up call (no, we do not have a baby in the house yet!), but sometimes a lazy Saturday is just what the doctor ordered. The Princess had a play date this morning with her two little girlfriends from preschool and was not a happy camper when it was time to go! My husband took our oldest son to our alma mater's basketball game today. He was so excited to go (all decked out in basketball gear with a sign to cheer on the team). I love his enthusiasm and love of the game!
We've been discussing our 52 Kind Acts Project a lot the past few days and I plan to update that blog later on. If you'd like to check that out, I am including some service activity ideas that even the youngest kiddos can help out with! I really can't stress enough how awesome I think this project is going to be for our kids and family. It will teach them a lot about helping others and show them that even small, thoughtful gestures can make a big difference.
I planned our menu this week and am taking advantage of a decent meat sale: ribs. This recipe is so easy and yummy (and one of two easy rib recipes that I use)! Ribs used to intimidate me, but not anymore!
Easy Ribs in the Oven
Rack of baby back ribs with bone (or more if needed)
Salt, pepper
Bottle of favorite BBQ sauce
Line a large baking sheet (I like to use a jellyroll pan) with a piece of aluminum foil large enough to cover pan twice. Line the foil with a piece of parchment paper. Place ribs, meat side up, on parchment paper. Season with salt, pepper, or any spices to taste. Fold the parchment paper and foil over the ribs and seal tightly on all sides. Bake at 300 degrees for 2 1/2 to 3 hours, until ribs are tender.
Remove from oven and peel back foil and paper. Brush on BBQ sauce. Return to oven uncovered and cook another 20-30 minutes, until sauce is brown and thickened.
We've been discussing our 52 Kind Acts Project a lot the past few days and I plan to update that blog later on. If you'd like to check that out, I am including some service activity ideas that even the youngest kiddos can help out with! I really can't stress enough how awesome I think this project is going to be for our kids and family. It will teach them a lot about helping others and show them that even small, thoughtful gestures can make a big difference.
I planned our menu this week and am taking advantage of a decent meat sale: ribs. This recipe is so easy and yummy (and one of two easy rib recipes that I use)! Ribs used to intimidate me, but not anymore!
Easy Ribs in the Oven
Rack of baby back ribs with bone (or more if needed)
Salt, pepper
Bottle of favorite BBQ sauce
Line a large baking sheet (I like to use a jellyroll pan) with a piece of aluminum foil large enough to cover pan twice. Line the foil with a piece of parchment paper. Place ribs, meat side up, on parchment paper. Season with salt, pepper, or any spices to taste. Fold the parchment paper and foil over the ribs and seal tightly on all sides. Bake at 300 degrees for 2 1/2 to 3 hours, until ribs are tender.
Remove from oven and peel back foil and paper. Brush on BBQ sauce. Return to oven uncovered and cook another 20-30 minutes, until sauce is brown and thickened.
Subscribe to:
Posts (Atom)